Category: Home Services

  • Best Home Maintenance Services: Essential Year-Round Guide

    Best Home Maintenance Services: Essential Year-Round Guide

    Regular home maintenance protects your property, improves comfort, and can help prevent expensive repairs. Small problems often become larger when they are ignored. A leaking pipe, clogged gutter, worn roof, or failing HVAC system can quickly turn into a major expense.

    Knowing the Best Home Maintenance Services: Essential Year-Round Guide can help homeowners stay ahead of these problems. Some tasks are easy to handle yourself. Others require trained professionals and specialized equipment.

    This year-round guide covers essential home maintenance services, seasonal priorities, common costs, hiring tips, and ways to build a practical maintenance schedule.

    Why Home Maintenance Services Matter

    A home contains many systems that work together every day. Plumbing, electrical, roofing, heating, cooling, drainage, appliances, and exterior surfaces all need attention.

    Routine maintenance can help identify problems before they become emergencies. It can also improve energy efficiency and extend the useful life of important home components.

    Professional maintenance is especially valuable for systems that are difficult or unsafe to inspect without proper training.

    For larger repair projects, our home improvement cost guide can help you plan and prioritize expenses.

    Best Home Maintenance Services to Schedule

    HVAC Maintenance

    Heating and cooling systems should receive regular attention. A professional HVAC technician can inspect the system, clean important components, check airflow, and identify potential problems.

    Routine service may help the system operate more efficiently. It can also reduce the likelihood of unexpected breakdowns during periods of extreme weather.

    Homeowners should also replace or clean HVAC filters according to the equipment manufacturer’s recommendations.

    Roof Inspection and Maintenance

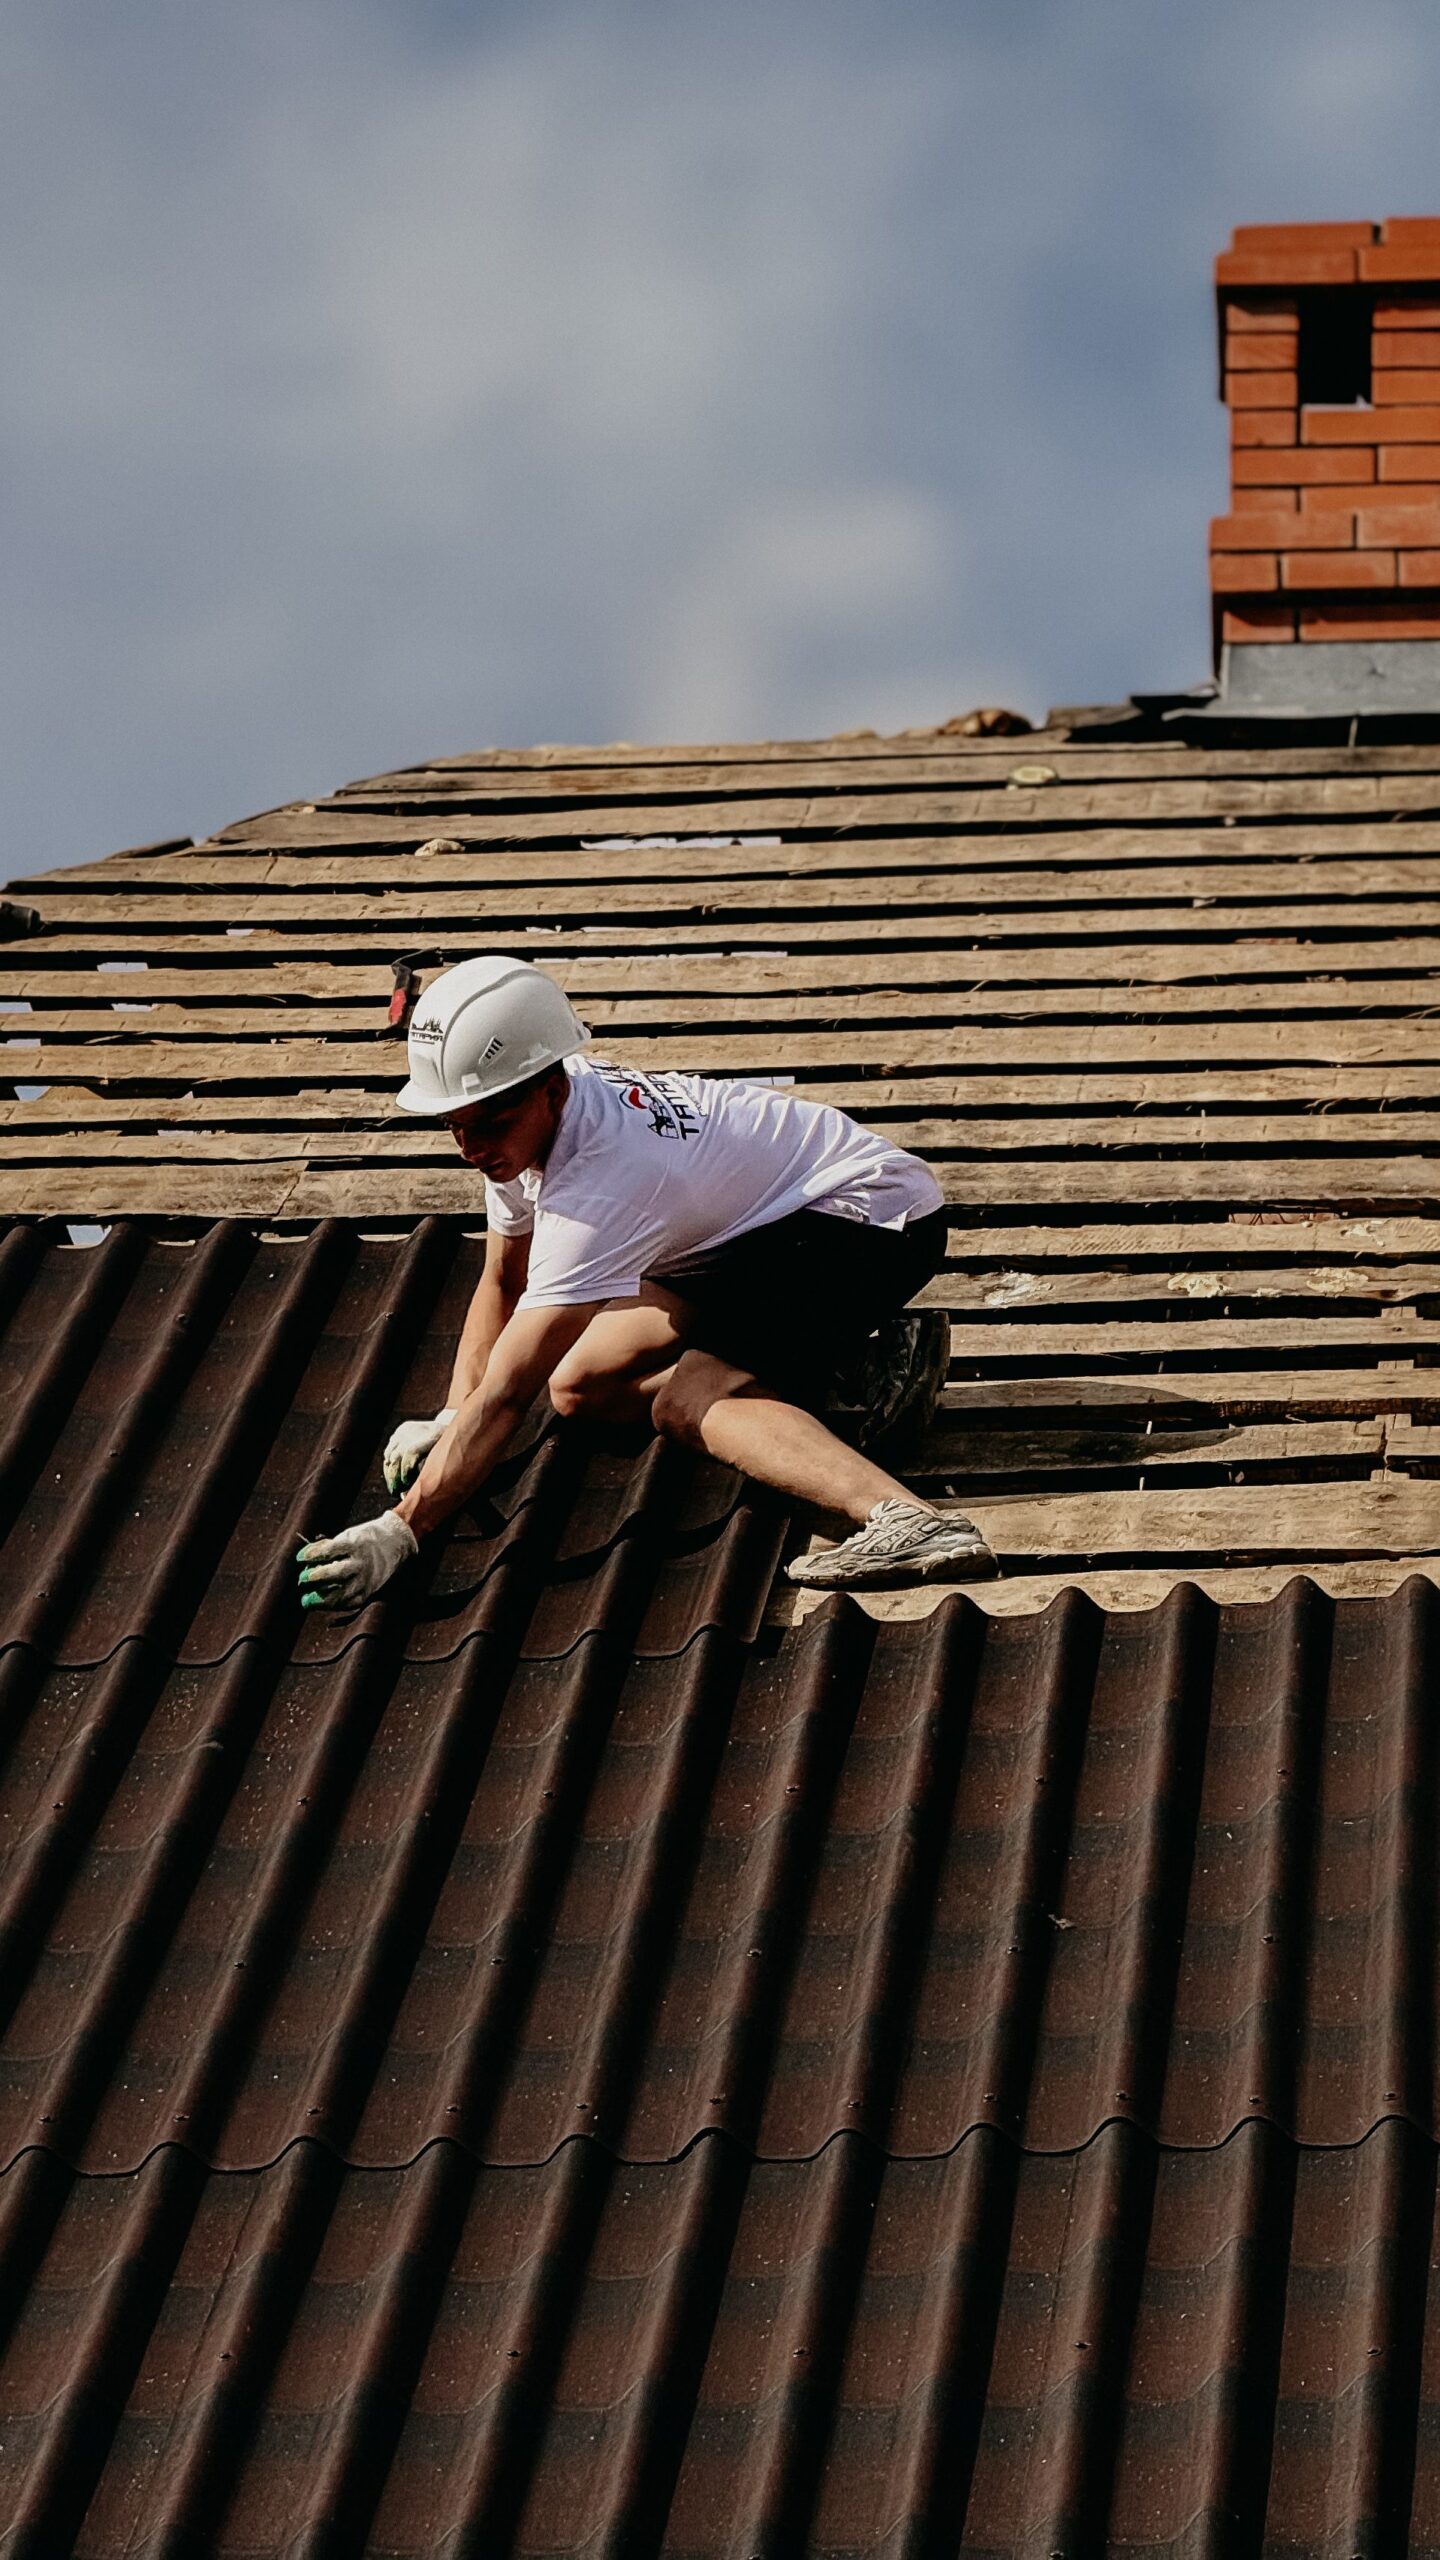
    Your roof protects the entire structure from weather. Missing shingles, damaged flashing, clogged drainage, and deteriorated seals can allow water to enter the home.

    A professional roof inspection can identify problems that are difficult to see from the ground.

    After severe weather, it is wise to check for visible damage. Avoid climbing onto a roof yourself if you are not trained and equipped to do so.

    The FEMA building science resources provide useful information about protecting homes from weather-related risks.

    Gutter Cleaning and Drainage

    Gutters direct rainwater away from your roof and foundation. When they become clogged, water can overflow against walls, fascia, landscaping, or foundation areas.

    Regular gutter cleaning is one of the simpler ways to reduce water-related maintenance problems.

    Downspouts should also direct water away from the home’s foundation. If your property has persistent drainage problems, consider our French drain cost guide for additional information.

    Plumbing Maintenance

    Plumbing problems can cause serious property damage. Leaking faucets are annoying, but hidden leaks can be much more costly.

    A professional plumber can inspect pipes, fixtures, water heaters, shutoff valves, and other components. Homeowners should also know where the main water shutoff valve is located.

    Fix leaks promptly. Even a small leak can waste water and damage surrounding materials over time.

    Electrical Inspections

    Electrical systems require special care. Flickering lights, frequent breaker trips, damaged outlets, burning smells, or warm electrical components should not be ignored.

    Electrical repairs should generally be handled by qualified professionals. Do not attempt complex electrical work without appropriate knowledge and authorization.

    The CPSC electrical safety guidance offers homeowner information about electrical hazards and safety.

    Spring Home Maintenance Checklist

    Spring is an ideal time to inspect your home after winter. Start outside and then move indoors.

    • Inspect the roof for visible damage.
    • Clean gutters and downspouts.
    • Check exterior walls for cracks or deterioration.
    • Inspect windows and doors for damaged seals.
    • Test outdoor faucets and irrigation systems.
    • Schedule HVAC maintenance before heavy cooling season.
    • Check decks, patios, and exterior stairs.
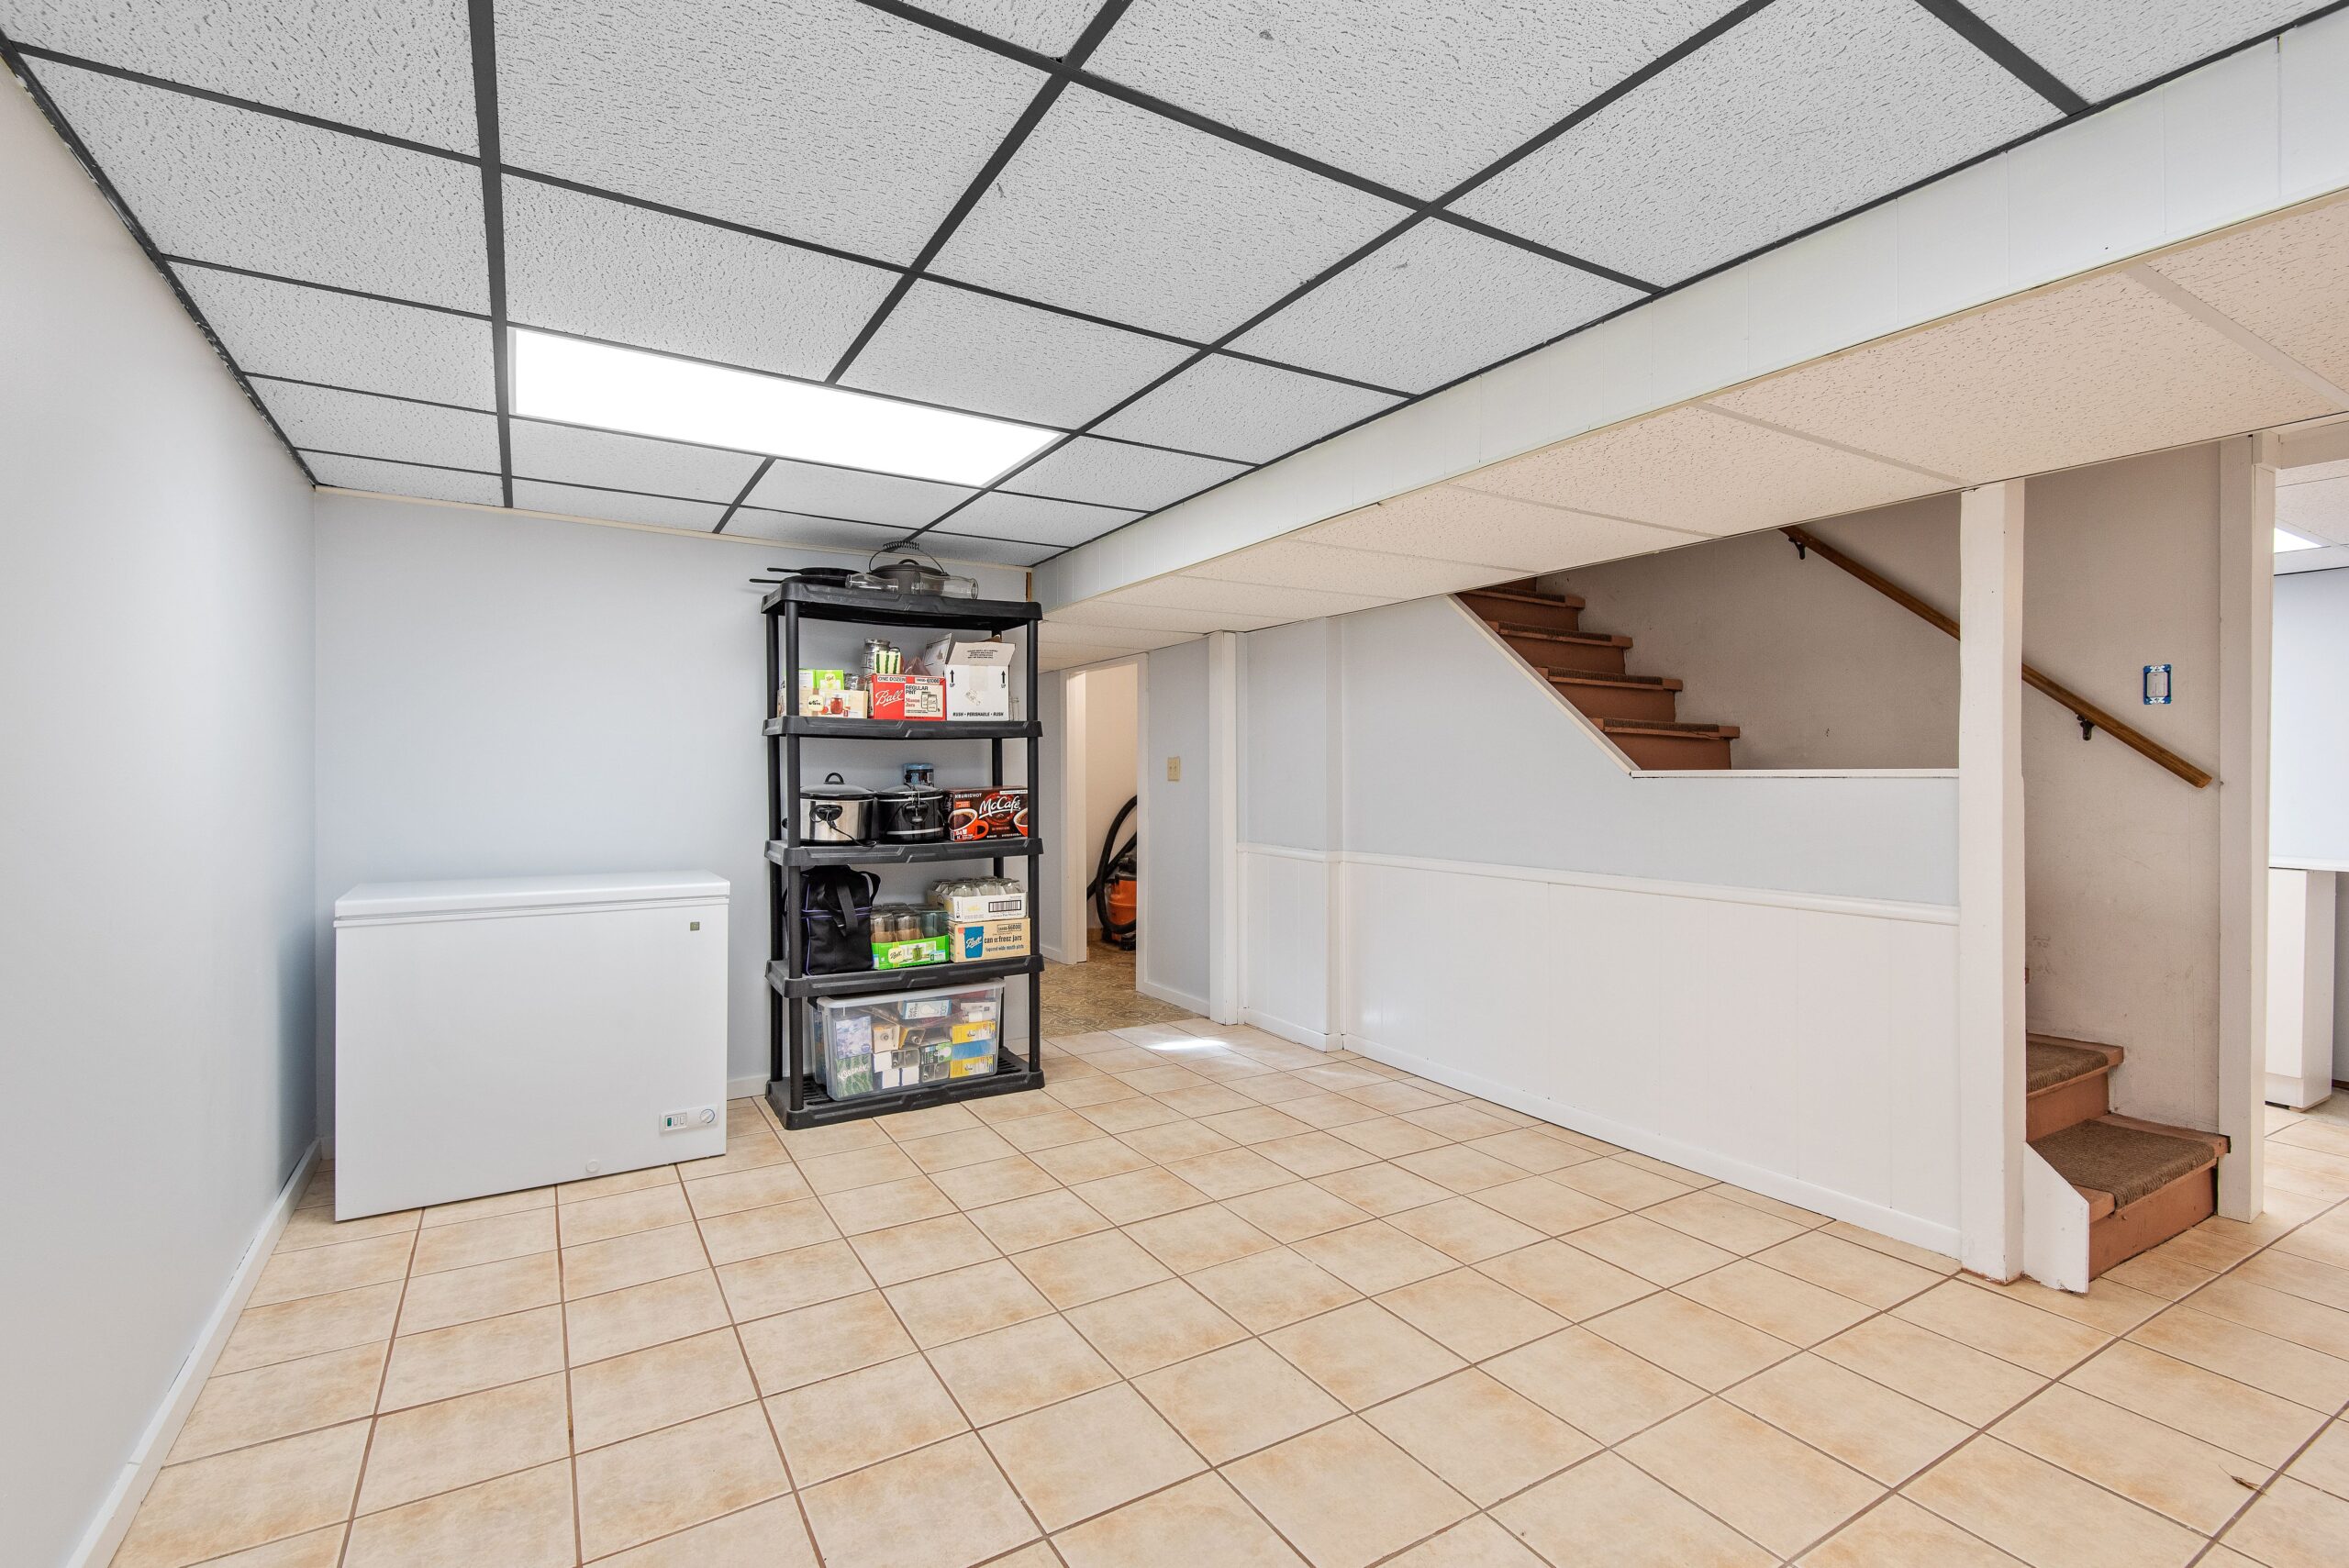
    • Inspect the basement or crawl space for moisture.

    Spring is also a good time to review your annual repair budget. If you discover several issues, prioritize problems that affect safety, water management, or structural integrity.

    Summer Home Maintenance Services

    Summer maintenance often focuses on cooling, plumbing, landscaping, and outdoor areas.

    Air Conditioning Service

    Schedule an HVAC inspection if your cooling system struggles to maintain comfortable temperatures. Unusual noises, weak airflow, or inconsistent cooling may indicate a problem.

    Keeping outdoor equipment clear of debris can also support proper airflow. Follow the manufacturer’s maintenance recommendations.

    Landscaping Maintenance

    Summer is a busy season for lawns, gardens, trees, and irrigation systems. Regular landscaping services may include mowing, trimming, pruning, mulching, irrigation checks, and weed management.

    Our landscaping services cost guide explains common outdoor maintenance and improvement expenses.

    Trim vegetation away from exterior equipment and structures where appropriate. Also watch for drainage issues after heavy rain.

    Deck and Patio Inspection

    Outdoor structures should be inspected for loose boards, damaged surfaces, deteriorated connections, and other visible problems.

    Address issues before they become safety hazards.

    Fall Home Maintenance Checklist

    Fall is the time to prepare your property for colder weather. It is also an excellent season for preventive maintenance.

    Heating System Inspection

    Have your heating system checked before you need it regularly. Professional service can identify potential issues before cold weather arrives.

    Gutter and Roof Preparation

    Falling leaves can clog gutters. Clean them before heavy rain or winter weather becomes a problem.

    Inspect roof drainage components and check visible flashing and seals. Professional inspection may be appropriate if you notice damage.

    Weatherproofing

    Check doors and windows for drafts. Damaged weatherstripping can allow conditioned air to escape.

    Sealing appropriate gaps can improve comfort and may reduce heating and cooling losses.

    Winter Home Maintenance Services

    Winter brings different risks. Cold temperatures can affect plumbing, heating systems, roofs, and exterior surfaces.

    Prevent Frozen Pipes

    In areas that experience freezing temperatures, exposed plumbing may need protection. Insulation can help reduce the risk of freezing in vulnerable locations.

    If you are leaving a property during freezing weather, follow appropriate winterization procedures for your home’s plumbing and heating systems.

    Monitor the Roof

    Heavy snow and ice can create additional stress and drainage problems. After significant storms, inspect the property from a safe location.

    Do not attempt dangerous roof or ice removal work without proper equipment and professional training.

    Check Indoor Air Quality

    Homes are often closed up during winter. Proper ventilation and appropriate humidity levels can support a healthier indoor environment.

    The EPA indoor air quality resources provide homeowner guidance on ventilation, pollutants, moisture, and other indoor air concerns.

    How Much Do Home Maintenance Services Cost?

    Maintenance costs vary by service, property size, location, equipment, and frequency. Routine lawn care may be relatively inexpensive, while professional HVAC, roofing, plumbing, or electrical services can cost considerably more.

    Emergency repairs are also usually more expensive than planned maintenance. That is one reason preventive service can be financially useful.

    Instead of waiting for failures, consider creating an annual maintenance budget. Set aside funds for routine service and larger replacement projects.

    For detailed planning, our home repair cost planning guide can help you organize common maintenance expenses.

    Which Home Maintenance Tasks Should You Hire a Professional For?

    Not every task requires a contractor. Simple cleaning, filter replacement, basic yard care, and visual inspections may be suitable for many homeowners.

    Professional assistance is more appropriate when a task involves significant height, electrical systems, gas appliances, structural components, refrigerants, or specialized diagnostic equipment.

    Hiring a professional can also make sense when you are unsure about the cause of a problem. A proper diagnosis can prevent you from spending money on the wrong repair.

    How to Choose the Best Home Maintenance Company

    Choosing the right service provider can protect both your home and your budget.

    Verify Credentials

    Check applicable licenses, insurance, certifications, and business information. Requirements vary by state and by type of work.

    For larger projects, our home contractor hiring guide provides additional questions to ask.

    Read Reviews Carefully

    Customer reviews can provide useful information about communication, punctuality, workmanship, and customer service. Look for patterns rather than relying on one review.

    Request Written Estimates

    A written estimate should clearly explain the service, labor, materials, fees, and expected scope of work.

    Ask about additional charges before work begins. This is particularly important for diagnostic visits and larger repair projects.

    Compare More Than Price

    The cheapest estimate is not always the best value. Consider experience, warranties, responsiveness, credentials, and the quality of the proposed solution.

    How to Build a Year-Round Home Maintenance Schedule

    A maintenance schedule makes home care easier. Instead of trying to remember every task, divide your checklist by season.

    Use spring for post-winter inspections. Focus on cooling and outdoor maintenance during summer. Prepare the property for cold weather in fall. Then monitor heating, plumbing, and indoor conditions during winter.

    Keep a simple record of completed work. Include service dates, contractor information, warranties, receipts, and replacement dates for major equipment.

    This record can help when planning future repairs or selling the property.

    Home Maintenance Mistakes to Avoid

    Several common mistakes can increase long-term costs.

    • Ignoring small leaks or water stains.
    • Skipping HVAC maintenance for years.
    • Allowing gutters to remain clogged.
    • Delaying roof repairs after visible damage.
    • Choosing contractors based only on the lowest quote.
    • Failing to keep maintenance records.
    • Attempting hazardous repairs without proper training.
    • Ignoring manufacturer maintenance recommendations.

    Small preventive actions can often be easier to manage than emergency repairs.

    How Regular Maintenance Can Protect Your Home Investment

    Your home is one of your largest financial assets. Maintenance helps preserve its condition and functionality.

    It can also improve your understanding of the property. When you inspect systems regularly, you are more likely to notice changes early.

    Maintenance does not guarantee that expensive repairs will never happen. However, it can help reduce avoidable problems and provide better opportunities for planned replacements.

    Final Thoughts on the Best Home Maintenance Services: Essential Year-Round Guide

    Following the Best Home Maintenance Services: Essential Year-Round Guide can make homeownership more manageable. Regular attention to roofing, HVAC, plumbing, electrical systems, drainage, landscaping, and exterior areas can help protect your property throughout the year.

    Start with the systems that affect safety and water protection. Then schedule seasonal maintenance based on your climate and home’s specific needs.

    Use qualified professionals for specialized work. Get written estimates and compare providers carefully. Keep records of every major service and repair.

    Most importantly, do not wait for every problem to become an emergency. A consistent maintenance routine can help you identify issues earlier, plan expenses, and keep your home comfortable for years to come.

  • Tree Removal Cost: Professional Service & Safety Guide

    Tree Removal Cost: Professional Service & Safety Guide

    Tree Removal Cost: Professional Service & Safety Guide is an important resource for homeowners who have a dead, damaged, diseased, or hazardous tree on their property. Tree removal is not simply a matter of cutting down a tree. It involves assessing risks, protecting nearby structures, managing branches and logs, and handling the stump and debris.

    Professional tree removal can protect your home, vehicles, landscaping, and other property. It can also reduce risks when a tree is close to power lines or structures. The final price depends on several factors, including tree height, trunk size, condition, location, and accessibility.

    This guide explains tree removal costs, common service options, professional safety practices, permits, cleanup expenses, and tips for choosing a qualified tree service.

    How Much Does Tree Removal Cost?

    Current 2026 U.S. estimates show that professional tree removal commonly costs between $200 and $2,000, with an average of about $750 per tree. Very large or difficult trees can cost substantially more. Angi reports that trees near power lines or structures can reach $10,000 or more because of the specialized equipment and additional safety requirements involved.

    Tree Removal Service Typical Planning Cost What Can Increase the Price
    Small tree removal $150–$500+ Limited access, difficult location
    Medium tree removal $250–$1,500+ Height, trunk size, obstacles
    Large tree removal $1,000–$2,000+ Specialized equipment and extensive cleanup
    Stump removal $100–$150+ for some projects Stump size and root spread
    Crane-assisted removal $500+ additional in some cases Tree size, access, complexity

    These are general estimates, not guaranteed quotes. A professional should inspect the tree and property before providing a final price.

    What Determines Tree Removal Cost?

    Tree Height

    Height is one of the biggest cost factors. Taller trees require more planning, equipment, labor, and controlled removal procedures. Large trees may also require specialized access equipment.

    Angi reports that tree height and proximity to a house or other structures are among the primary factors affecting the final removal price.

    Tree Condition

    A healthy tree can present different challenges from a dead or severely damaged tree. Diseased, unstable, or storm-damaged trees may require additional planning and equipment.

    A professional should assess the tree before deciding whether removal is necessary. In some cases, pruning or other tree-care measures may be appropriate instead.

    Location

    A tree in an open yard is usually easier to manage than one located between a house, garage, fence, sidewalk, and utility lines. Restricted access can increase labor costs and may require specialized equipment.

    Proximity to Power Lines

    Trees close to overhead electrical lines require particular caution. Contact with energized lines can create a serious electrocution hazard.

    OSHA identifies contact with overhead power lines, falling branches, tools, and falls as major hazards in tree-care work.

    Equipment Requirements

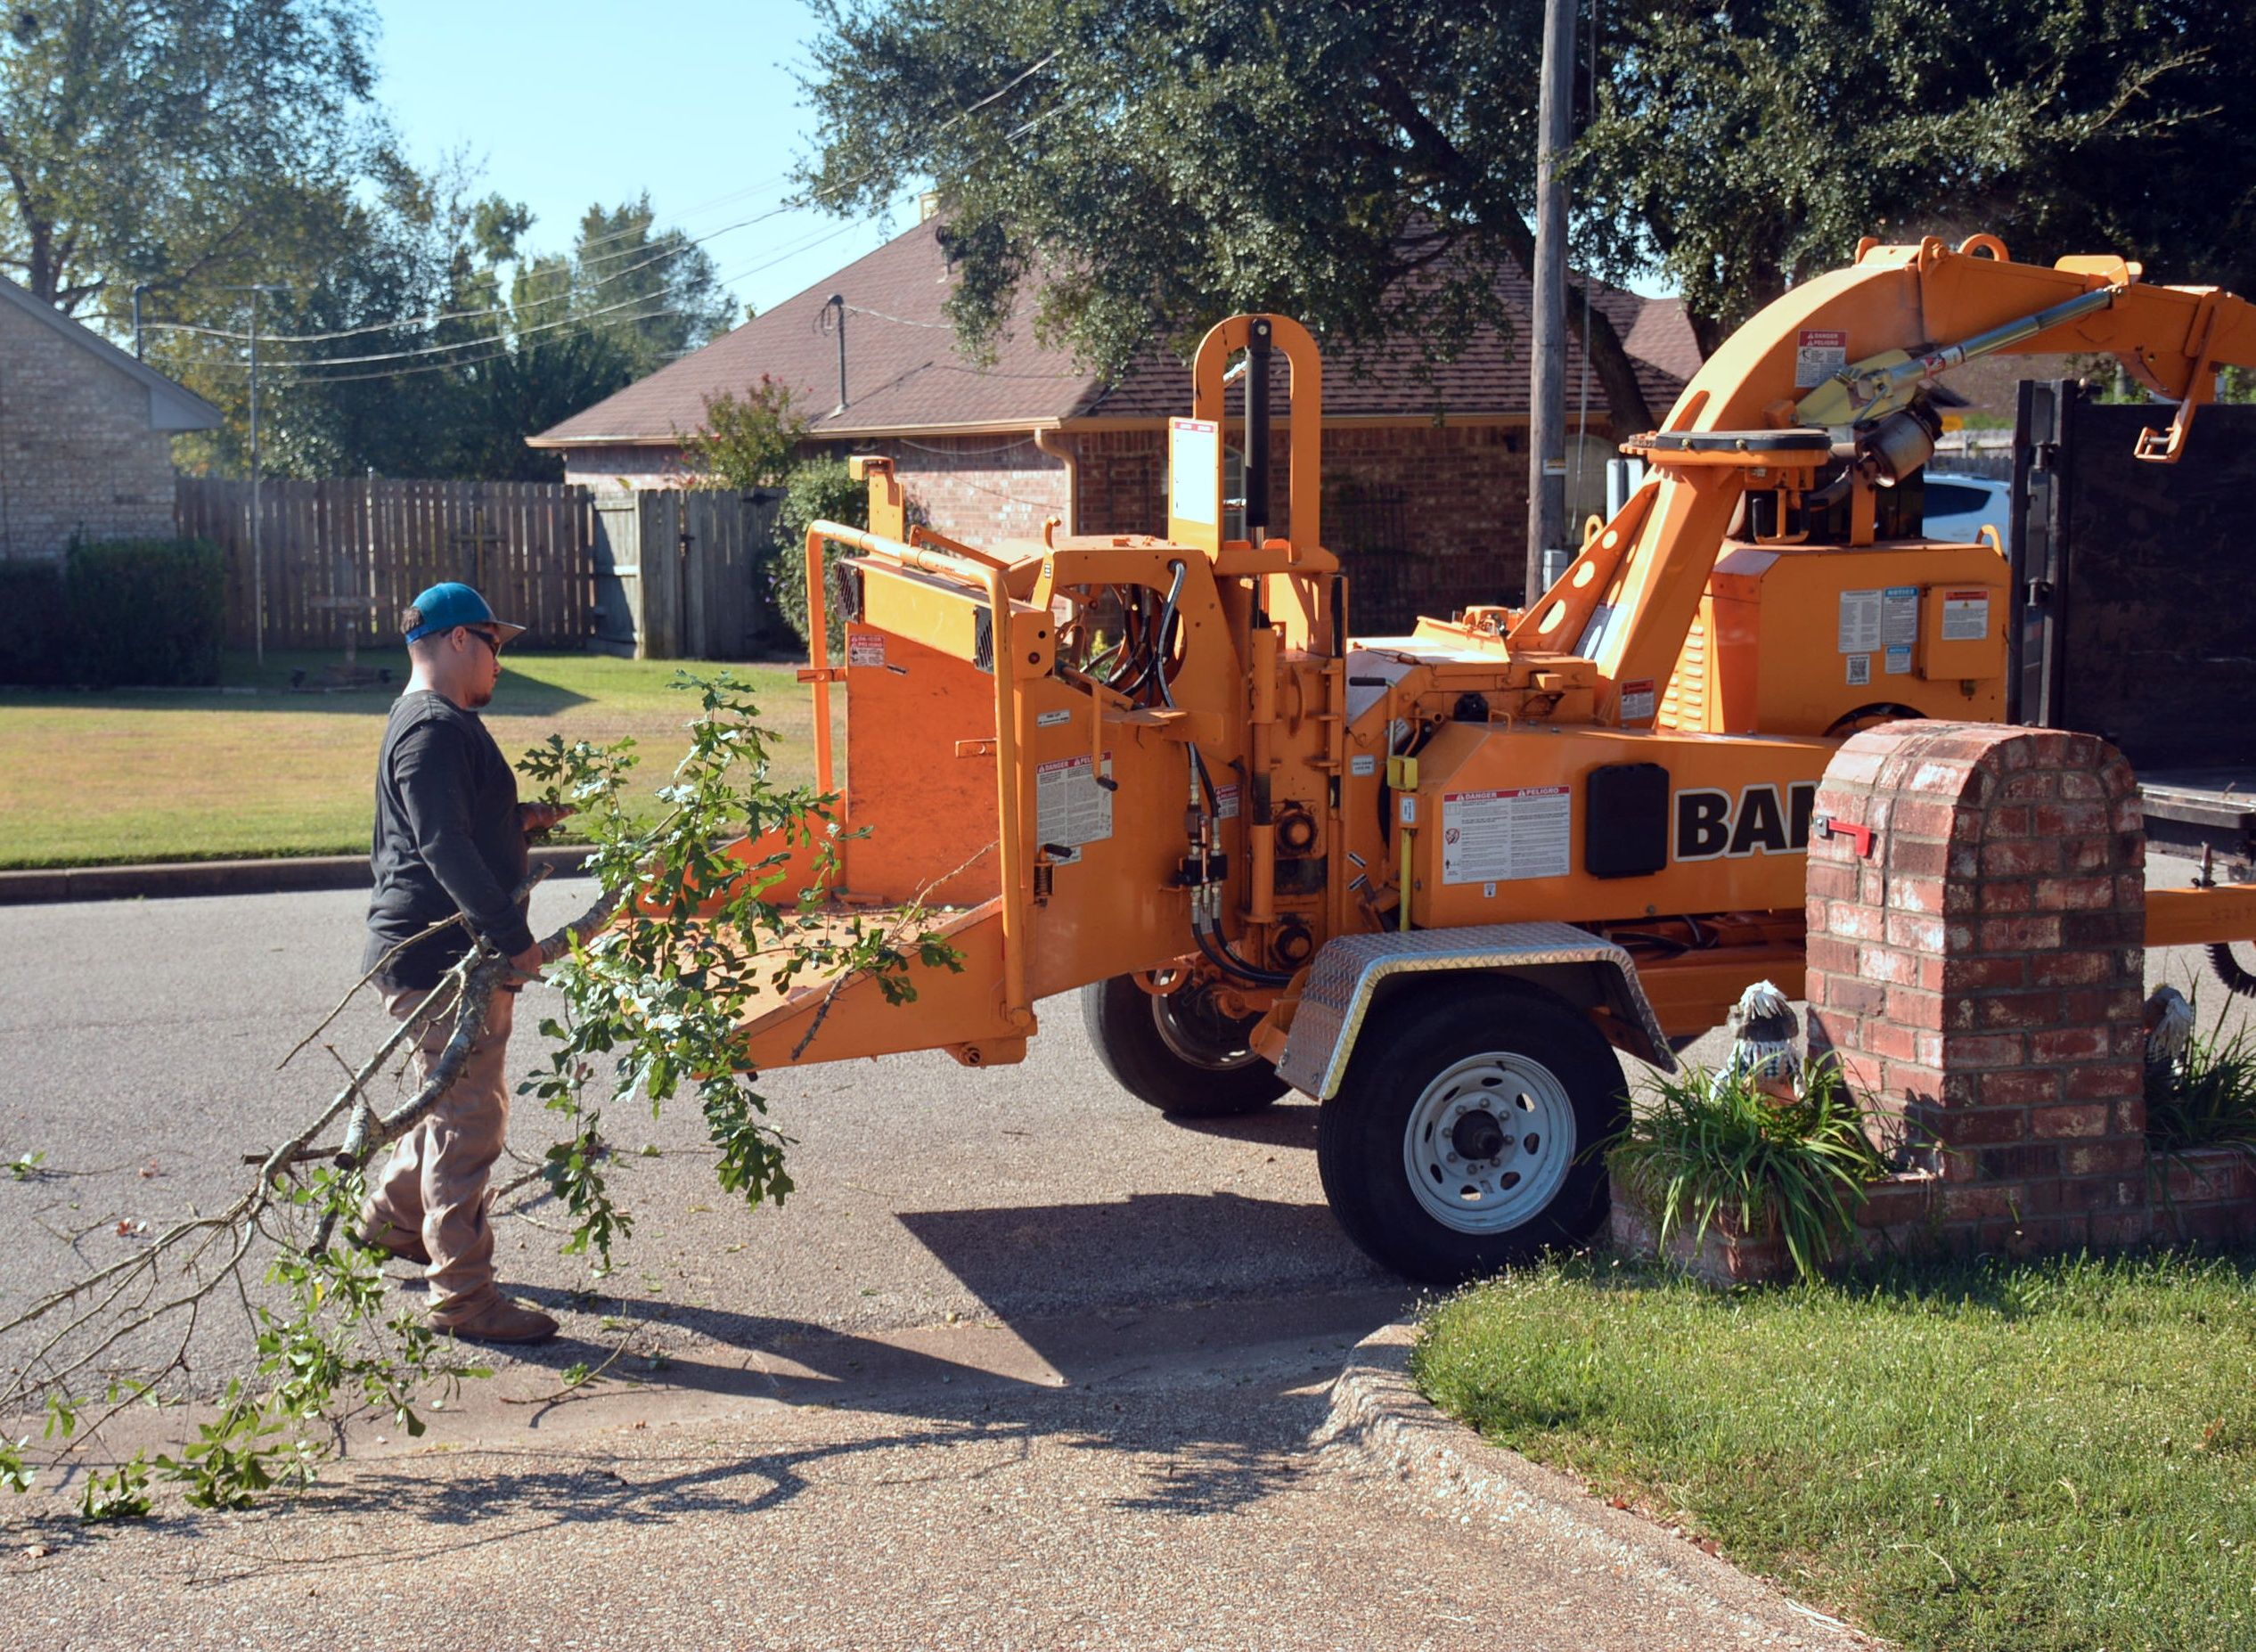
    Some projects require bucket trucks, cranes, chippers, specialized cutting equipment, or additional rigging systems. Angi reports that crane services can add hundreds of dollars or significantly more to difficult projects.

    Tree Removal vs. Tree Trimming

    Tree removal is not always the best solution. Sometimes a tree can remain healthy and safe with professional pruning or trimming.

    Tree trimming removes selected branches to improve structure, health, clearance, or safety. Tree removal eliminates the entire tree because it is dead, hazardous, severely damaged, obstructing construction, or otherwise unsuitable for its location.

    The International Society of Arboriculture explains that arborists can assess whether a tree should be removed and can also provide pruning, tree-risk assessment, and preventive maintenance services.

    If you are uncertain about a tree, consider an assessment before automatically scheduling removal. Professional tree inspections can help homeowners understand the condition of the tree and available options.

    Professional Tree Removal Process

    1. Tree Assessment

    A professional begins by examining the tree and surrounding property. The assessment may consider tree health, lean, branches, trunk condition, nearby structures, utilities, access points, and potential hazards.

    2. Site Planning

    The crew determines how the tree can be removed while protecting people and property. Large or complicated trees may require specialized equipment and carefully planned removal procedures.

    3. Work Area Preparation

    The surrounding area is prepared before removal begins. Vehicles, outdoor furniture, equipment, and other vulnerable items may need to be moved away from the work zone.

    4. Controlled Removal

    Professional crews use appropriate equipment and procedures to remove the tree in manageable sections when necessary. The method depends on the tree, site conditions, and available access.

    Because tree removal involves falling branches, heavy materials, cutting equipment, and elevated work, it should not be treated as an ordinary DIY landscaping project. OSHA identifies tree-care work as involving serious hazards, including falls, struck-by objects, cuts, and electrical contact.

    5. Debris Cleanup

    After the tree is removed, branches and logs must be processed and removed. Some companies include basic cleanup in their quote, while others charge separately.

    Ask the contractor whether the estimate includes wood chipping, hauling, log removal, and final cleanup. Clarifying these services can prevent unexpected charges.

    Stump Removal and Grinding Costs

    Tree removal does not necessarily include stump removal. A stump may remain after the tree is cut down unless you specifically request additional work.

    Stump grinding uses specialized equipment to reduce the visible stump below the surrounding surface. Complete stump removal involves more extensive excavation and root removal.

    Angi’s 2026 tree removal estimates list approximately $100 to $150 as an optional stump-removal cost for its example project, although actual prices vary significantly by stump size, species, access, and local labor rates.

    If you plan to install new landscaping, fencing, paving, or another structure in the same location, discuss the desired level of stump and root removal with the contractor before work begins.

    Do You Need a Tree Removal Permit?

    Permit rules vary by city, county, and state. Some jurisdictions regulate the removal of certain trees based on size, species, location, environmental protections, or property type.

    Do not assume that a tree on private property can always be removed without approval. Angi notes that permit requirements can depend on factors such as tree size, species, and location.

    Before scheduling professional tree removal, contact your local authority or ask the contractor to confirm applicable requirements. A reputable company should be willing to explain the permit process.

    Tree Removal Safety: Why Professional Service Matters

    Tree removal can involve significant hazards. Branches can fall unexpectedly. Large sections of a tree can damage buildings or vehicles. Power lines can create electrical hazards. Workers may also need to operate equipment at height.

    OSHA lists falls, falling objects, cuts, electrocution, and equipment-related hazards among the risks associated with tree-care operations.

    For this reason, homeowners should avoid attempting complex tree removal themselves. Trees near electrical lines, buildings, roads, or other structures are particularly unsuitable for casual DIY removal.

    The International Society of Arboriculture recommends hiring trained and equipped professionals for tree work, especially when large trees or hazardous conditions are involved.

    Signs a Tree May Need Professional Attention

    Not every unhealthy-looking tree needs removal. However, certain signs justify professional evaluation.

    • Large dead branches.
    • Visible trunk damage.
    • Significant decay or cavities.
    • Major cracks or splits.
    • Severe storm damage.
    • A noticeable change in tree stability.
    • Branches interfering with structures.
    • Tree growth close to utility lines.
    • Roots causing significant property problems.
    • A tree that is dead or declining substantially.

    An arborist can determine whether pruning, treatment, structural support, or removal is the most appropriate option.

    How to Choose Professional Tree Removal Services

    Choosing the right contractor is essential. Do not select a company based only on the lowest quote.

    Look for a professional with appropriate experience, insurance, and safety procedures. The International Society of Arboriculture provides a directory that can help homeowners find and verify ISA-credentialed arborists.

    Before signing a contract, ask:

    • Are you properly insured?
    • Who will perform the work?
    • Will you handle permits if required?
    • Is stump grinding included?
    • Is debris hauling included?
    • What equipment will the project require?
    • How will nearby structures and landscaping be protected?
    • What happens if weather delays the project?
    • Will the quote remain valid if additional work is discovered?

    Insurance is particularly important. Angi recommends verifying both liability insurance and workers’ compensation coverage before hiring a tree service.

    For additional home-service research, homeowners can also explore professional tree removal and home improvement services.

    How to Save Money on Tree Removal

    The best way to manage tree removal costs is to obtain several detailed estimates. Make sure each company is quoting the same scope of work.

    Ask whether cleanup, hauling, stump grinding, and permits are included. A quote that appears cheaper may become more expensive once these services are added.

    Early professional assessment can also help. Addressing hazardous branches or declining trees before they cause property damage may reduce the complexity of a future emergency project.

    Regular tree maintenance can also be useful. Current estimates put professional tree trimming at roughly $270 to $1,800, depending on size, species, condition, and accessibility.

    Tree Removal and Property Protection

    Healthy trees can provide shade, beauty, privacy, and environmental benefits. Removal should therefore be based on a reasonable assessment rather than convenience alone.

    However, a dead, severely damaged, or unsafe tree can create significant property risks. TreesAreGood notes that arborists can help homeowners determine when a tree presents an unacceptable risk or when removal is necessary because of damage, obstruction, disease, or construction.

    The goal is to balance tree preservation with safety. Professional evaluation can help homeowners make that decision with better information.

    Final Thoughts on Tree Removal Cost: Professional Service & Safety Guide

    Tree Removal Cost: Professional Service & Safety Guide shows why there is no single price for every tree. In 2026, professional removal commonly falls around $200 to $2,000, with an average near $750, while very large or difficult projects can cost much more.

    Tree height, condition, location, accessibility, equipment, permits, and cleanup all affect the final price. Stump removal may also be an additional service.

    Most importantly, safety should come before price. Tree removal can involve falling branches, heavy equipment, elevated work, and electrical hazards. A qualified professional can assess the tree, plan the work, manage hazards, and protect nearby property.

    Before hiring a contractor, compare detailed estimates, verify insurance, confirm permit requirements, and clarify exactly what the quoted price includes. With proper planning and professional service, homeowners can address hazardous trees while protecting their property and making informed decisions about long-term tree care.

  • Landscaping Services: Cost, Maintenance & Home Improvement

    Landscaping Services: Cost, Maintenance & Home Improvement

    Well-planned landscaping can change the look and feel of a home. It can create a better outdoor living area, improve curb appeal, and make routine yard work easier. However, landscaping costs can vary widely depending on the property’s size, project type, materials, plants, and labor.

    Understanding Landscaping Services: Cost, Maintenance & Home Improvement can help homeowners plan outdoor projects with greater confidence. A simple lawn cleanup may have a modest cost. A complete landscape renovation with patios, drainage, planting, lighting, and irrigation can require a much larger investment.

    This guide explains common landscaping services, pricing factors, maintenance needs, home improvement opportunities, and tips for hiring a professional landscaping company.

    What Do Landscaping Services Include?

    Landscaping services cover a broad range of outdoor improvements and maintenance tasks. Some homeowners need regular lawn care. Others want a complete backyard transformation.

    Common services include lawn mowing, trimming, planting, pruning, mulching, garden design, irrigation, tree and shrub care, drainage work, hardscaping, outdoor lighting, and seasonal cleanup.

    Some companies focus mainly on maintenance. Others offer design and installation services. Full-service landscaping companies may manage a project from the initial design through installation and ongoing maintenance.

    If you are planning several improvements at once, our home improvement cost guide can help you organize your overall renovation budget.

    How Much Do Landscaping Services Cost?

    Landscaping prices depend heavily on the type and size of the project. Routine maintenance is usually priced differently from design and installation work.

    Basic lawn care may be charged per visit or through a recurring service plan. Larger projects are more likely to use project-based pricing.

    Factors that can affect the total cost include:

    • Yard size: Larger properties usually require more labor and materials.
    • Project complexity: Detailed designs require more planning and installation work.
    • Plant selection: Mature plants and specialty varieties can increase material costs.
    • Hardscaping: Patios, retaining walls, pathways, and outdoor kitchens can significantly increase project costs.
    • Site preparation: Clearing, grading, excavation, and soil improvement can add labor.
    • Drainage: Poor drainage may require specialized solutions.
    • Irrigation: New sprinkler or drip systems add equipment and installation costs.
    • Location: Local labor rates and material availability affect pricing.

    For another major outdoor expense, see our driveway installation cost guide for planning and material considerations.

    Common Landscaping Services for Homeowners

    Lawn Care

    Lawn care is one of the most common recurring landscaping services. It can include mowing, edging, trimming, seasonal cleanup, and other routine tasks.

    Regular maintenance helps keep a yard attractive without requiring homeowners to spend every weekend working outdoors.

    Landscape Design

    A landscape designer can create a plan before installation begins. The design may show plant locations, pathways, patios, lighting, irrigation, and other features.

    A good plan can also reduce costly changes during construction. It helps homeowners decide where to invest and where to keep the design simple.

    Planting and Garden Installation

    Professional landscapers can install trees, shrubs, flowers, ground covers, and other plants. Plant selection should consider sunlight, soil, water requirements, mature size, and local climate.

    The EPA WaterSense landscaping guidance offers useful information about efficient landscape planning and water conservation.

    Mulching

    Mulch can improve the appearance of planting beds. It can also help retain soil moisture and reduce weed growth when used correctly.

    Different types of mulch have different appearance, durability, and maintenance characteristics. Ask your landscaper which option fits your garden and local conditions.

    Tree and Shrub Maintenance

    Trees and shrubs often require pruning, shaping, and seasonal care. Larger tree work may require a qualified tree-care professional rather than a general lawn service.

    Do not attempt hazardous tree work without appropriate training and equipment. Large branches and trees can create serious safety risks.

    Hardscaping and Outdoor Home Improvements

    Landscaping is not limited to plants. Hardscaping adds permanent or semi-permanent outdoor features that can improve how a property is used.

    Patios and Walkways

    A patio can create an outdoor area for dining, relaxing, or entertaining. Walkways can improve access between the driveway, house, garden, and other areas.

    Material choices may include concrete, pavers, natural stone, brick, or other outdoor surfaces. Each option has different installation and maintenance requirements.

    Retaining Walls

    Retaining walls can help manage changes in elevation. They can also create planting areas and improve the structure of a sloped yard.

    However, drainage is important. A poorly designed retaining wall can experience pressure from water and soil. Larger walls may also require engineering or permits depending on local rules.

    Outdoor Lighting

    Landscape lighting can improve visibility around walkways and outdoor areas. It can also highlight trees, gardens, architectural features, and patios.

    LED fixtures are commonly used because of their efficiency and long service life. A professional can help position fixtures to provide useful illumination without creating excessive glare.

    Outdoor Living Areas

    Outdoor living improvements can include seating areas, fire features, pergolas, outdoor kitchens, and covered spaces. These additions can make a yard more functional throughout the year.

    For larger projects, make sure electrical, plumbing, structural, and local code requirements are considered before construction begins.

    Landscaping Maintenance: What Should You Budget For?

    Installing a beautiful landscape is only the beginning. Ongoing maintenance protects the investment and keeps plants healthy.

    Your maintenance budget may include mowing, pruning, fertilizing, irrigation adjustments, weed control, mulch replacement, leaf removal, and seasonal cleanup.

    The amount of maintenance depends on the landscape design. A complex garden with many plant varieties may require more attention than a simple yard with low-maintenance plants.

    Seasonal Maintenance

    Landscaping needs change throughout the year. Spring may require planting and cleanup. Summer often brings irrigation and lawn-care demands. Fall can involve leaf removal and pruning. Winter preparation may include protecting sensitive plants.

    Creating a seasonal plan can make maintenance more predictable.

    How Landscaping Can Improve Your Home

    Thoughtful landscaping can contribute to several areas of home improvement.

    Improve Curb Appeal

    A maintained front yard creates a strong first impression. Clean planting beds, healthy plants, defined pathways, and a maintained lawn can make the property look more inviting.

    Create Outdoor Living Space

    Backyard landscaping can turn unused areas into functional spaces. A patio, seating area, shade structure, or garden can make the yard more useful.

    Improve Drainage

    Landscaping can also address water-management problems. Proper grading and drainage can help move rainwater away from structures and reduce standing water.

    Our French drain cost guide provides additional information about one common drainage option.

    Increase Privacy

    Trees, shrubs, hedges, and fencing can create privacy around outdoor areas. Plant selection should account for mature height and width.

    Fast-growing plants may provide quicker screening. However, they can require more pruning. A balanced design often considers both growth rate and long-term maintenance.

    How to Choose a Landscaping Company

    Hiring the right contractor can make a major difference. Do not choose a company based only on the lowest price.

    Review Experience and Services

    First, determine whether the company handles the type of work you need. A lawn maintenance company may not be equipped for major drainage, grading, or hardscape construction.

    Ask for examples of similar completed projects. This can help you understand the company’s capabilities.

    Request a Detailed Estimate

    A professional estimate should explain labor, materials, preparation, disposal, installation, and ongoing maintenance when applicable.

    For larger projects, ask whether design fees, permits, excavation, drainage, and site preparation are included.

    Check Insurance and Local Requirements

    Ask whether the company carries appropriate business and liability insurance. Licensing requirements vary by location and by type of work.

    For broader contractor selection advice, visit our home contractor hiring guide.

    Compare Multiple Quotes

    Comparing two or three qualified contractors can provide useful pricing context. Make sure the quotes cover similar materials and the same scope of work.

    A very low quote may leave out important preparation or installation steps. A higher quote may include better materials or more comprehensive services.

    How to Reduce Landscaping Costs

    You do not need to complete every outdoor improvement at once. A phased approach can make a large project easier to manage.

    Start with priorities. Address drainage, unsafe trees, and major grading problems before cosmetic improvements.

    Next, choose plants that suit the local climate and existing conditions. Plants that naturally thrive in the area may require less water and maintenance.

    You can also use a mix of professional and DIY maintenance. For example, a homeowner might hire professionals for installation and handle routine watering, weeding, or light garden care.

    Another useful strategy is to simplify the design. Fewer plant varieties and clearly defined planting areas can reduce maintenance time.

    Questions to Ask Before Starting a Landscaping Project

    Before signing a contract, ask clear questions. This can prevent surprises later.

    • Is landscape design included?
    • Which plants and materials are included?
    • Who handles permits if they are required?
    • Is site preparation included in the estimate?
    • How will drainage be addressed?
    • What type of irrigation system is recommended?
    • Who will remove existing landscaping?
    • How long will installation take?
    • What maintenance is required after installation?
    • Are plants covered by a warranty?
    • What happens if the project requires additional work?

    Landscaping and Water Conservation

    Water use should be considered when designing a new landscape. Overwatering can waste resources and may create problems around foundations or planting beds.

    Drip irrigation, efficient sprinkler systems, mulch, appropriate plant selection, and proper watering schedules can all help manage water use.

    The EPA WaterSense program provides educational resources for homeowners who want to use water more efficiently.

    Native and climate-appropriate plants can also reduce maintenance in suitable locations. However, plant choices should always reflect the specific growing conditions of your property.

    Is Professional Landscaping Worth the Cost?

    Professional landscaping can be worthwhile when a project requires design expertise, specialized equipment, grading, drainage, hardscaping, irrigation, or extensive planting.

    It can also save time. Instead of managing several separate contractors, a full-service landscaping company may coordinate multiple parts of the project.

    However, not every task requires professional help. Simple mowing, weeding, and basic garden maintenance may be manageable for homeowners who have the time and equipment.

    The best approach depends on your budget, property, skills, and project complexity.

    Final Thoughts on Landscaping Services: Cost, Maintenance & Home Improvement

    Understanding Landscaping Services: Cost, Maintenance & Home Improvement can help you create a realistic outdoor improvement plan. Landscaping costs depend on yard size, materials, labor, design complexity, drainage, irrigation, and the type of improvements you choose.

    Start by identifying your main goals. You may want better curb appeal, a low-maintenance yard, improved drainage, more privacy, or a functional outdoor living area.

    Then create a budget and prioritize essential work. Get detailed estimates from qualified landscaping professionals. Compare the scope of work instead of looking only at the final price.

    Finally, remember that maintenance is part of the long-term cost. A landscape that looks beautiful but requires constant attention may not be the right choice for your lifestyle.

    With thoughtful planning, appropriate materials, and regular maintenance, landscaping can become a valuable part of your home’s overall improvement strategy.

  • Chimney Repair Services: Costs, Maintenance & Safety

    Chimney Repair Services: Costs, Maintenance & Safety

    Chimney Repair Services: Costs, Maintenance & Safety are important for homeowners who use fireplaces, wood stoves, or other vented heating appliances. A chimney does more than add character to a home. It helps move smoke and combustion gases safely outside.

    Over time, weather, moisture, heat, age, and normal wear can damage masonry, flashing, crowns, caps, and chimney liners. Small problems can also become expensive when they are ignored. Regular inspections and timely repairs can help protect both the chimney and the home.

    This guide explains chimney repair costs, common repair types, maintenance requirements, warning signs, and practical tips for choosing a qualified chimney professional.

    How Much Does Chimney Repair Cost?

    Chimney repair prices vary significantly by project. Current 2026 estimates from Angi put common chimney repairs at about $160 to $750, with an average around $455. More extensive work can cost several thousand dollars. A complete chimney replacement can reach approximately $15,000.

    HomeGuide provides a similar broad range. It estimates minor repairs at roughly $200 to $850, extensive repairs at $500 to $7,000, and major rebuilding or replacement at approximately $4,000 to $15,000.

    Chimney Project Typical 2026 Cost Range
    Minor chimney repairs $160–$850
    Chimney flashing repair $300–$1,800
    Chimney crown repair $150–$1,500+
    Chimney crown replacement $1,000–$3,000
    Repointing or tuckpointing $500–$2,500
    Chimney liner replacement $1,500–$7,000
    Partial chimney rebuild $1,000–$5,000+
    Full chimney replacement $4,000–$15,000

    These numbers are planning estimates rather than fixed prices. A professional inspection is necessary before determining the actual repair requirements.

    What Affects Chimney Repair Costs?

    Type of Chimney

    Brick and masonry chimneys often require specialized masonry work. Metal and prefabricated systems have different components and repair requirements. The material can affect both labor and replacement costs.

    Extent of Damage

    A loose cap is much easier to repair than a leaning chimney. Small cracks may require limited work, while widespread spalling or deteriorated mortar can require rebuilding.

    Chimney Height

    Tall chimneys can cost more because contractors may need additional safety equipment, scaffolding, or specialized access equipment. Difficult roof slopes can also increase labor time.

    Accessibility

    A chimney that is easy to reach is generally less expensive to repair than one located on a steep roof or in a difficult area. Access can have a major impact on labor costs.

    Permits and Additional Repairs

    Some projects may require permits or additional structural work. Ask your contractor whether permits, debris disposal, roof repairs, or masonry restoration are included in the estimate.

    Common Chimney Repairs

    Chimney Cap Repair or Replacement

    The chimney cap sits at the top of the chimney. It helps keep rain, snow, debris, and animals out while allowing exhaust to escape properly.

    A damaged or missing cap can expose the chimney to moisture. That moisture can contribute to masonry deterioration over time.

    Current HomeGuide estimates place chimney cap replacement around $200 to $850, depending on materials and installation conditions.

    Chimney Crown Repair

    The crown helps protect the top of a masonry chimney from water. Cracks or deterioration can allow water to penetrate the structure.

    Small cracks may be repairable. A severely damaged crown may need replacement. Current estimates range from roughly $150 to $1,500 or more for repairs, while complete replacement can reach about $3,000.

    Brick and Mortar Repair

    Weather can gradually damage brick and mortar. Repointing or tuckpointing replaces deteriorated mortar joints. This work can help preserve the chimney before more serious structural damage develops.

    HomeGuide estimates chimney tuckpointing at approximately $500 to $2,500, with difficult access and greater chimney height increasing the cost.

    Flashing Repair

    Flashing seals the area where the chimney meets the roof. Damaged flashing can allow water to enter the home and cause stains, wood damage, or moisture problems.

    Current estimates place professional chimney flashing repair around $300 to $1,800.

    If you notice water around the fireplace or ceiling near the chimney, do not assume the masonry is the only problem. The flashing and roof intersection should also be inspected.

    Chimney Liner Repair

    The chimney liner helps protect the chimney structure and supports the safe movement of combustion gases. Damaged liners may require professional evaluation and repair or replacement.

    Liner work is more specialized than simple masonry repair. Current estimates for liner replacement can range from approximately $1,500 to $7,000.

    Signs Your Chimney Needs Repair

    Knowing the warning signs can help homeowners address problems earlier. Look for:

    • Cracked or missing bricks.
    • Loose or deteriorated mortar.
    • White staining on masonry.
    • Visible cracks in the crown.
    • A damaged or missing chimney cap.
    • Water stains near the fireplace or chimney.
    • Rust or deterioration around metal components.
    • Visible leaning or structural movement.
    • Unusual odors or persistent moisture.
    • Poor draft or smoke entering the living area.

    These signs do not always identify the exact cause. A professional should evaluate the chimney before major repair decisions are made.

    Why Regular Chimney Maintenance Matters

    Regular maintenance can help identify problems before they become expensive. It can also support safer operation of fireplaces and venting systems.

    Creosote is a flammable residue associated with burning wood. If it accumulates inside a chimney, it can increase fire risk. Regular inspection and cleaning can help identify and address buildup.

    For homeowners seeking broader chimney maintenance information, the Chimney Safety Institute of America provides educational resources and information about chimney professionals.

    It is also wise to follow manufacturer instructions for fireplaces, wood stoves, and other heating equipment. Proper operation and maintenance should be part of an overall home safety plan.

    Chimney Inspection and Cleaning

    A chimney inspection can reveal problems that are not obvious from ground level. A professional may examine the exterior masonry, crown, cap, flashing, interior flue, and other accessible components.

    Inspection costs can vary widely based on the inspection level, chimney height, number of flues, and accessibility. Current Angi estimates range from about $80 to $6,300, reflecting the substantial difference between basic inspections and more complex assessments.

    Do not choose an inspection solely because it has the lowest price. Ask what the inspection includes and whether the contractor will provide written findings and photographs when appropriate.

    Chimney Repair Process

    1. Professional Inspection

    The process should begin with an evaluation of the chimney and surrounding roof area. The contractor identifies visible damage and potential moisture or structural issues.

    2. Diagnosis

    The professional determines the likely cause of the problem. For example, water damage may be related to a cracked crown, damaged flashing, open mortar joints, or several issues at once.

    3. Written Estimate

    Request an itemized estimate before approving major work. It should identify materials, labor, repairs, access equipment, disposal, and any additional services.

    4. Repair or Rebuild

    The repair method depends on the condition of the chimney. Minor deterioration may require repointing or sealing. Severe structural damage may require partial or complete rebuilding.

    5. Final Inspection

    After repairs, the completed work should be checked. The contractor should also explain any recommended maintenance and the expected service life of the repaired components.

    When Does a Chimney Need Rebuilding?

    Not every damaged chimney needs complete replacement. A qualified professional should determine whether repair is practical.

    Rebuilding may become necessary when there is extensive cracking, severe spalling, significant mortar deterioration, or structural instability. A visibly leaning chimney deserves prompt professional attention.

    HomeGuide estimates roofline chimney rebuilding at approximately $1,000 to $3,500, while complete replacement can cost $4,000 to $15,000.

    Early repairs can sometimes prevent a small masonry problem from becoming a major reconstruction project.

    Chimney Safety Tips for Homeowners

    Chimney safety starts with professional maintenance. Avoid using a fireplace or heating appliance if you notice serious structural damage, smoke entering the home, or other conditions that suggest unsafe operation.

    Keep combustible materials away from fireplaces and follow the appliance manufacturer’s operating instructions. Make sure appropriate smoke and carbon monoxide alarms are installed and maintained according to applicable guidance.

    Never ignore unusual smoke behavior, strong unexplained odors, or visible damage. A qualified professional can determine whether the chimney or venting system needs repair before continued use.

    For additional home fire-safety information, homeowners can consult the NFPA home fire safety resources.

    How to Choose Chimney Repair Services

    Choosing a qualified contractor is one of the most important decisions in a chimney repair project. Look for experience with your chimney type and the specific repair required.

    • Request multiple written estimates.
    • Ask for references and proof of relevant qualifications.
    • Confirm what the warranty covers.
    • Ask whether roof access and scaffolding are included.
    • Request photographs of significant defects when practical.
    • Ask whether permits are required.
    • Confirm whether cleanup and disposal are included.
    • Get all major recommendations in writing.

    Homeowners can also compare local home-service professionals through resources such as chimney repair and home improvement services.

    How to Save Money on Chimney Repairs

    The best way to control chimney repair costs is to address small problems before they spread. A deteriorated mortar joint or damaged flashing may be much less expensive to correct than extensive water damage or structural rebuilding.

    Schedule routine inspections when appropriate for your fireplace and chimney system. Keep gutters and roof drainage functioning properly. Watch for water stains and masonry deterioration after severe weather.

    Most importantly, compare quotes based on the complete scope of work rather than the lowest initial price. A cheap repair that fails to address the underlying problem may cost more over time.

    Final Thoughts on Chimney Repair Services: Costs, Maintenance & Safety

    Chimney Repair Services: Costs, Maintenance & Safety should be considered together because maintenance and timely repairs can help prevent more expensive problems. Current 2026 estimates show that minor repairs may cost hundreds of dollars, while major rebuilding can reach thousands or even $15,000 for extensive replacement.

    The most important step is to identify the actual cause of chimney damage. A cracked crown, deteriorated mortar, damaged flashing, or defective liner may require different solutions.

    Do not wait for a small warning sign to become a major structural issue. Arrange a professional inspection when damage is visible or chimney performance changes. Then compare detailed estimates and choose a qualified contractor.

    With regular maintenance, prompt repairs, and responsible fireplace use, homeowners can protect their chimney, reduce avoidable repair expenses, and support a safer home environment.

  • Home Foundation Repair Cost: Signs, Options & Tips

    Home Foundation Repair Cost: Signs, Options & Tips

    Foundation problems can be stressful for any homeowner. A small crack may be harmless, while a growing crack can point to a more serious structural issue. That is why knowing the Home Foundation Repair Cost: Signs, Options & Tips can help you make informed decisions before a problem becomes more expensive.

    Foundation repair prices vary widely. The final cost depends on the foundation type, extent of movement, soil conditions, drainage, accessibility, and repair method. A professional inspection is often the best starting point.

    In this guide, you will learn the common signs of foundation trouble, typical cost factors, repair options, financing considerations, and practical tips for choosing a qualified contractor.

    What Is the Average Home Foundation Repair Cost?

    Home foundation repair can range from a relatively small repair to a major structural project. Minor crack repairs may cost a few hundred dollars. More extensive repairs can reach several thousand dollars or more.

    There is no universal price because every foundation problem is different. For example, sealing a small non-structural crack is very different from stabilizing a foundation that has experienced significant settlement.

    Foundation repair estimates may include inspection fees, excavation, materials, labor, waterproofing, drainage improvements, structural reinforcement, and permits.

    For broader renovation planning, our home improvement cost guide can help you compare other major home repair expenses.

    What Factors Affect Foundation Repair Cost?

    Several factors can change your final repair bill. Understanding them makes it easier to compare estimates.

    Type of Foundation

    Homes may have slab foundations, crawl spaces, basements, or other foundation systems. Each requires different inspection and repair techniques.

    A slab repair, for example, may require specialized equipment. A basement foundation may also require excavation or waterproofing.

    Severity of the Damage

    Minor cosmetic cracks are usually less expensive to address than structural movement. Significant settlement, bowing walls, or large horizontal cracks may require more extensive work.

    The sooner a serious issue is identified, the more options you may have. Delaying necessary repairs can sometimes allow water intrusion or structural movement to worsen.

    Soil Conditions

    Soil plays an important role in foundation performance. Expansive soils can swell when wet and shrink when dry. Poorly compacted soil can also contribute to settlement.

    This is why repairing the visible crack alone may not solve the underlying problem.

    Accessibility

    Foundation work can require excavation or specialized equipment. Tight crawl spaces, landscaping, driveways, and nearby structures can make access more difficult.

    Drainage and Water Problems

    Water management is another major consideration. Poor grading, clogged gutters, leaking downspouts, and inadequate drainage can increase moisture around the foundation.

    The EPA’s stormwater and rainwater guidance offers useful information about managing rainwater around residential properties.

    Signs Your Home May Need Foundation Repair

    Foundation problems do not always appear suddenly. Many develop gradually. Knowing the warning signs can help you arrange an inspection before the damage becomes more complicated.

    Cracks in Walls or Ceilings

    Small cracks can occur naturally as a home settles. However, cracks that grow, become wider, or appear alongside other symptoms deserve attention.

    Pay particular attention to cracks around doors, windows, corners, and areas where walls meet ceilings.

    Doors and Windows That Stick

    Doors or windows that suddenly become difficult to open may indicate changes in the structure. This does not automatically mean the foundation is failing. However, it is worth investigating if the problem is new or getting worse.

    Uneven or Sloping Floors

    Floors that feel noticeably uneven can have several causes. Foundation movement is one possibility. Framing, moisture, or other structural issues can also contribute.

    Basement Wall Cracks

    Horizontal cracks in basement walls can be especially important because soil pressure may contribute to wall movement. Water intrusion can also occur around foundation cracks.

    If you notice persistent moisture, see our basement waterproofing cost guide for related repair considerations.

    Gaps Around Doors or Windows

    New gaps around frames may indicate movement. Again, the surrounding symptoms matter. A qualified professional should determine the cause rather than relying on appearance alone.

    Common Foundation Repair Options

    The right repair method depends on the cause and severity of the problem. A reputable contractor should explain why a specific method is recommended.

    Crack Repair and Sealing

    Some cracks can be sealed using epoxy, polyurethane, or other appropriate materials. The goal may be to prevent water entry or restore the affected surface.

    Crack sealing is not necessarily a solution for active structural movement. The underlying cause should be evaluated first.

    Foundation Piers

    Piers can be used to stabilize or support areas affected by settlement. Different pier systems are designed for different soil and structural conditions.

    Because installation can involve excavation and specialized equipment, costs vary significantly between properties.

    Slabjacking and Polyurethane Injection

    Some concrete slabs that have settled may be raised using specialized injection techniques. The appropriate method depends on the slab, soil conditions, access, and cause of settlement.

    Wall Reinforcement

    Bowing or moving basement walls may sometimes require reinforcement. Depending on the situation, contractors may recommend wall anchors, braces, carbon fiber reinforcement, or other systems.

    Drainage Improvements

    Sometimes the best foundation strategy is to address water management. Improvements can include extending downspouts, correcting grading, installing drainage systems, or addressing other sources of water around the home.

    Our French drain cost guide explains one common drainage solution and the factors that can affect installation costs.

    Foundation Repair vs. Foundation Replacement

    Foundation repair does not always mean replacing the foundation. In many cases, targeted stabilization or waterproofing can address the problem.

    Foundation replacement is a much larger project. It may involve extensive excavation, structural work, temporary support, and reconstruction.

    Never assume that replacement is necessary simply because a contractor recommends it. Consider getting an independent structural evaluation when the proposed project is large or expensive.

    Does Homeowners Insurance Cover Foundation Repair?

    Homeowners insurance coverage depends on the policy and the cause of the damage. Many policies do not cover foundation problems caused by gradual settlement, normal wear, or certain soil-related conditions.

    However, damage resulting from a covered event may be treated differently. Policy language matters.

    Before approving a major repair, contact your insurer and ask what documentation is required. The USA.gov homeowners insurance information is also a useful starting point for understanding general policy considerations.

    Keep photographs, inspection reports, estimates, receipts, and other records. Good documentation can make insurance discussions easier.

    How to Choose a Foundation Repair Contractor

    Foundation work is a major investment. Choosing the right contractor matters as much as choosing the repair method.

    Check Licensing and Insurance

    Requirements vary by location. Verify applicable licensing, business registration, and insurance before signing a contract.

    Ask for a Written Scope of Work

    The estimate should explain what will be repaired. It should also identify materials, labor, drainage work, excavation, permits, and any warranties that apply.

    A vague estimate can make it difficult to compare contractors accurately.

    Get Multiple Opinions

    For significant foundation problems, consider getting more than one professional opinion. Compare the diagnosis, not just the price.

    Our home contractor selection guide includes additional questions to ask before hiring a repair professional.

    Ask About Warranties

    Foundation companies may offer warranties on certain repair systems. Read the terms carefully. Ask what is covered, how long coverage lasts, and whether there are maintenance requirements.

    How to Save Money on Foundation Repairs

    Saving money does not always mean choosing the cheapest contractor. Instead, focus on preventing unnecessary work and addressing the root cause.

    First, schedule an inspection when you notice persistent warning signs. Early investigation can help you understand the problem before it expands.

    Next, fix drainage issues. Clean gutters regularly and make sure downspouts move water away from the foundation.

    Also, compare detailed estimates. Make sure each contractor is pricing the same scope of work.

    Finally, ask whether repairs can be completed in phases. Some projects have urgent structural or water-control needs, while cosmetic work may be handled later.

    Foundation Maintenance Tips for Homeowners

    Good maintenance can help reduce moisture-related foundation problems and make changes easier to spot.

    • Keep gutters clear of leaves and debris.
    • Direct downspouts away from the foundation.
    • Watch for new cracks or changes in existing cracks.
    • Check basement and crawl-space areas for moisture.
    • Maintain appropriate drainage around the property.
    • Inspect plumbing for leaks near the foundation.
    • Keep records of previous foundation repairs.

    For a wider maintenance routine, our home maintenance checklist can help you organize seasonal inspections.

    Questions to Ask Before Foundation Repair Begins

    Before signing a contract, ask direct questions. Clear answers can help you avoid unexpected costs.

    • What is causing the foundation problem?
    • Is the damage structural or primarily cosmetic?
    • What repair method do you recommend?
    • Why is this method appropriate for my property?
    • Is excavation required?
    • Will drainage improvements be necessary?
    • Are permits required?
    • What is included in the quoted price?
    • What happens if additional damage is discovered?
    • What warranty is included?
    • How long should the repair take?

    When Should You Call a Professional?

    Not every foundation crack requires an emergency repair. Still, certain symptoms should not be ignored.

    Contact a qualified professional if cracks are growing, doors and windows suddenly stick, floors become noticeably uneven, basement walls appear to move, or water repeatedly enters through foundation areas.

    If you notice several symptoms at the same time, an inspection becomes even more important. A professional can determine whether the issue involves the foundation, drainage, soil, framing, or another part of the home.

    Final Thoughts on Home Foundation Repair Cost: Signs, Options & Tips

    Understanding Home Foundation Repair Cost: Signs, Options & Tips can help you approach foundation problems with a clearer plan. Costs depend on the type of foundation, severity of movement, soil conditions, accessibility, water problems, and selected repair method.

    Do not judge a foundation problem by the size of a crack alone. Look at the complete picture. New cracks, sticking doors, uneven floors, water intrusion, and wall movement can provide important clues.

    Start with a professional evaluation when you have reasonable concerns. Then compare detailed repair plans from qualified contractors.

    Most importantly, address the underlying cause. A repair that ignores drainage, soil movement, or water problems may not provide the long-term solution you need.

    With careful inspection, realistic budgeting, and the right contractor, homeowners can make smarter foundation repair decisions and protect one of their property’s most important structural components.

  • Basement Waterproofing Cost: Professional Home Guide

    Basement Waterproofing Cost: Professional Home Guide

    Basement Waterproofing Cost: Professional Home Guide is a useful starting point for homeowners dealing with leaks, damp walls, standing water, or recurring basement moisture. Waterproofing can protect a home from water damage and help create a cleaner, more usable basement.

    The right solution depends on where the water comes from. In some homes, better grading and downspout drainage may solve the problem. Other properties need interior drainage, a sump pump, exterior excavation, foundation waterproofing, or a combination of methods.

    Understanding the costs and available solutions makes it easier to compare contractors and avoid paying for work that does not address the actual source of the water.

    What Is Basement Waterproofing?

    Basement waterproofing is a group of methods used to reduce or prevent water from entering a basement. These methods can manage groundwater, surface runoff, foundation seepage, and other moisture sources.

    Water can reach a foundation in several ways. Rainwater may collect around the house. Poor grading can direct runoff toward foundation walls. Groundwater can enter through cracks, joints, floors, or walls. Plumbing leaks can also create basement moisture.

    The U.S. Environmental Protection Agency recommends managing water outside the foundation, fixing leaks, and controlling moisture before problems become more serious.

    Basement Waterproofing Cost in 2026

    Current U.S. cost estimates vary considerably. HomeGuide reports an average basement waterproofing range of approximately $6,000 to $18,000. It places interior waterproofing around $6,000 to $12,000 and exterior waterproofing around $10,000 to $18,000.

    Angi reports a broader professional waterproofing range of about $2,461 to $8,201, depending on the method and basement size. Its figures also show that individual components, such as sump pumps, drainage systems, grading, and exterior membranes, can have very different prices.

    These differences are important. A small moisture-control project is not comparable to a complete exterior excavation and foundation waterproofing project.

    Waterproofing Approach Typical Planning Range Best Used For
    Basic moisture corrections Hundreds to several thousand dollars Minor drainage and runoff issues
    Interior waterproofing $6,000–$12,000 Interior drainage and water management
    Exterior waterproofing $10,000–$18,000 Foundation-level water intrusion
    Sump pump installation About $1,200–$2,500 Collecting and pumping basement water

    Use these numbers as budgeting guidelines rather than guaranteed prices. A professional inspection is the best way to determine the actual project cost.

    What Affects Basement Waterproofing Cost?

    Basement Size

    A larger basement usually requires more materials and labor. Longer foundation walls can also increase the amount of drainage work required.

    Foundation Type

    Concrete block, poured concrete, stone, and other foundation types can present different moisture challenges. The condition of the foundation also matters.

    Severity of Water Intrusion

    A few damp spots are different from repeated flooding. Significant water entry may require drainage improvements, pumps, excavation, or foundation repairs.

    Accessibility

    Interior projects can become more complicated when contractors need to work around finished walls, flooring, plumbing, utilities, or built-in structures.

    Local Soil and Drainage

    Soil conditions affect how water moves around a foundation. Poor drainage can keep soil saturated and increase pressure against foundation walls.

    The EPA explains that foundations are exposed to rainwater, plumbing leaks, rain-soaked soil, groundwater, and condensation.

    Most Common Basement Waterproofing Methods

    Interior Drainage Systems

    An interior drainage system collects water that reaches the basement and directs it toward a sump or suitable discharge point. This approach can be practical when exterior excavation is difficult or expensive.

    Interior systems may include drainage channels, drain tile, collection points, and a sump pump. The exact design depends on where water enters and how the basement is constructed.

    Sump Pump Installation

    A sump pump collects water in a pit and pumps it away from the foundation. A properly designed system can be an important part of basement water management.

    Backup protection may also be worth considering in areas where power outages or heavy storms are common. Ask the contractor what type of backup system is appropriate for your property.

    Exterior Waterproofing

    Exterior waterproofing addresses water at the outside of the foundation. It may involve excavation, foundation-wall preparation, waterproof membranes, drainage materials, and backfilling.

    This approach can be more expensive because excavation requires significant labor. However, it can address water before it reaches the foundation wall.

    Angi notes that exterior methods generally cost more than interior work because excavation is labor-intensive.

    Foundation Crack Repair

    Foundation cracks can allow water to enter a basement. The appropriate repair depends on the type, size, location, and cause of the crack.

    A contractor should determine whether the crack is simply a moisture-entry point or a sign of a larger foundation problem. Do not assume that sealing a crack alone will solve every basement leak.

    Grading and Downspout Improvements

    Not every waterproofing project requires major construction. Sometimes the first step should be improving exterior drainage.

    Water should move away from the foundation rather than collect beside it. The EPA recommends managing water outside foundation walls and directing downspout runoff away from the house.

    For homeowners planning broader drainage work, the EPA moisture-control guidance provides useful information about managing water and preventing moisture problems.

    Interior vs. Exterior Basement Waterproofing

    Choosing between interior and exterior waterproofing depends on the source of the problem.

    Interior waterproofing manages water after it reaches the interior side of the foundation. It can be useful when exterior access is limited. It may also have a lower initial cost in some situations.

    Exterior waterproofing attempts to stop water before it enters the foundation. It usually requires excavation and can be more expensive. However, it may be appropriate when exterior drainage and foundation-wall conditions are the main causes of water intrusion.

    There is no universal solution. A qualified contractor should inspect the property before recommending a major system.

    Signs Your Basement May Need Waterproofing

    Several warning signs deserve attention. These include:

    • Recurring water on the basement floor.
    • Damp or discolored foundation walls.
    • Musty odors.
    • Visible mold or mildew growth.
    • White mineral deposits on masonry.
    • Peeling paint or damaged finishes.
    • Water entering after heavy rain.
    • Cracks that repeatedly allow moisture inside.
    • A sump pump that runs frequently.

    A damp basement should not simply be covered with paint or finished over. The moisture source should be identified first. The EPA specifically recommends correcting basement moisture problems before converting a basement into living space.

    Basement Waterproofing Process

    1. Inspection

    A professional should first identify where the water comes from. This may involve inspecting foundation walls, floors, gutters, downspouts, grading, plumbing, and existing drainage systems.

    2. Moisture Source Identification

    The contractor should determine whether the problem involves surface water, groundwater, condensation, plumbing, foundation cracks, or several sources.

    3. System Recommendation

    Once the cause is understood, the contractor can recommend an appropriate solution. This may involve exterior drainage, interior drainage, a sump pump, crack repair, grading, or another combination.

    4. Installation

    Installation methods vary by project. Interior drainage may require opening sections of the basement floor. Exterior waterproofing can require excavation along foundation walls.

    5. Water Management and Testing

    After installation, the drainage and pumping system should be checked. The contractor should also explain where collected water is discharged and how the system should be maintained.

    How to Choose a Basement Waterproofing Contractor

    Choosing the contractor is as important as choosing the waterproofing method. Start by getting multiple written estimates.

    Each estimate should explain the problem, recommended solution, materials, labor, warranty, drainage design, and any additional repairs.

    • Ask whether the quote includes excavation or concrete removal.
    • Ask how the contractor identified the source of water.
    • Confirm whether permits are required.
    • Review the warranty in writing.
    • Ask whether cleanup and restoration are included.
    • Check references and relevant experience.
    • Compare several detailed estimates before signing.

    Homeowners can also research local professionals through established home-service resources such as home improvement contractor services.

    Ways to Reduce Basement Waterproofing Costs

    Early action can sometimes prevent a small drainage issue from becoming a larger project. Start with basic exterior water management.

    Keep gutters clean. Extend downspouts away from the foundation. Check whether the soil slopes away from the house. Repair plumbing leaks promptly.

    The EPA recommends directing surface water away from foundation walls and correcting drainage problems.

    However, avoid choosing a cheap fix simply because it has the lowest upfront price. A waterproof coating may not solve a groundwater problem. Similarly, a sump pump may not address exterior grading or foundation-wall issues.

    The best value comes from fixing the underlying cause.

    Basement Waterproofing and Home Value

    Waterproofing is primarily a property-protection investment. It can help reduce the risk of recurring water damage, mold-related moisture problems, and deterioration of finished basement areas.

    It can also make a basement more practical for storage, recreation, or future renovation. However, homeowners should not assume that every dollar spent on waterproofing will translate directly into an equal increase in resale value.

    Instead, think of waterproofing as preventative maintenance and risk reduction. A dry basement can support the long-term condition and usability of the property.

    Final Thoughts on Basement Waterproofing Cost: Professional Home Guide

    Basement Waterproofing Cost: Professional Home Guide shows why there is no single price for every home. Current U.S. estimates range from relatively small drainage projects to major waterproofing systems costing many thousands of dollars.

    The most important step is identifying the source of the water. A good solution should manage that source rather than simply hide its symptoms.

    Start with gutters, downspouts, grading, and visible leaks. If those measures do not solve the problem, obtain a professional assessment. Compare detailed quotes and ask exactly what each contractor plans to install.

    With the right approach, basement waterproofing can help protect your foundation, reduce moisture problems, and create a more usable home for years to come.

  • Fire Damage Restoration Services: Cost & What to Expect

    Fire Damage Restoration Services: Cost & What to Expect

    Fire damage can affect much more than the area where flames were present. Smoke, soot, heat, and water from firefighting can spread through walls, ceilings, flooring, furniture, and personal belongings. As a result, cleanup often requires several different restoration services.

    Understanding Fire Damage Restoration Services: Cost & What to Expect can help you make better decisions after a fire. It can also help you avoid unnecessary expenses. The right restoration company can assess the property, secure the structure, remove damaged materials, clean smoke residue, and restore the affected areas.

    Costs vary based on the size of the property, the severity of the fire, the type of damage, and the amount of rebuilding required. Insurance coverage can also have a major impact on your final out-of-pocket expense.

    What Are Fire Damage Restoration Services?

    Fire damage restoration services are professional services used to clean, repair, and restore a property after a fire. Restoration may begin as soon as the fire department declares the property safe to enter.

    A restoration project can include several stages. These may involve emergency board-up services, water removal, smoke cleanup, odor control, structural repairs, and reconstruction.

    Importantly, fire damage is not limited to burned materials. Smoke particles can travel throughout a home. Water used to extinguish the fire can then create additional moisture problems.

    If your property has also suffered water damage, see our water damage restoration cost guide for more information about cleanup and recovery.

    How Much Does Fire Damage Restoration Cost?

    The cost of fire restoration can range from a few thousand dollars for limited damage to tens of thousands of dollars for major structural fires. Severe cases can cost significantly more when extensive reconstruction is required.

    There is no single price that applies to every property. A small kitchen fire may only require smoke cleaning and replacement of a few materials. A major house fire may require demolition, structural repairs, electrical work, roofing, drywall replacement, and complete interior reconstruction.

    Several factors influence the final estimate:

    • Fire severity: Larger fires usually require more labor and materials.
    • Property size: More square footage can mean more cleaning and restoration work.
    • Smoke damage: Smoke can affect rooms far from the original fire.
    • Water damage: Firefighting water may require extraction and drying.
    • Structural damage: Walls, ceilings, floors, and framing may need repairs.
    • Contents damage: Furniture, electronics, clothing, and other belongings may need specialized cleaning.
    • Odor removal: Persistent smoke odors can require specialized treatments.
    • Reconstruction: Rebuilding damaged areas can become a major part of the project.

    For additional home repair budgeting advice, visit our home improvement cost guide.

    Fire Damage Restoration Cost Breakdown

    Emergency Board-Up and Property Securing

    After a fire, parts of the property may be exposed or unsafe. A restoration company may board up windows, doors, and other openings. Temporary roof protection may also be needed.

    These services help protect the property from weather, theft, and further damage. They may also be important for preventing unauthorized access while the structure is being evaluated.

    Water Extraction and Drying

    Fire suppression can leave large amounts of water inside a property. Wet drywall, flooring, insulation, and other materials can deteriorate quickly.

    Professional crews may use extraction equipment, air movers, and dehumidifiers to dry affected areas. Fast action can reduce the risk of secondary moisture damage.

    Smoke and Soot Cleanup

    Smoke and soot can settle on walls, ceilings, furniture, cabinets, and other surfaces. The type of smoke matters because different materials can leave different residues.

    Professional cleaners may use specialized cleaning products and equipment based on the affected material. In some cases, porous materials may need replacement rather than cleaning.

    The EPA’s indoor air quality resources provide useful information about indoor pollutants and contamination sources.

    Odor Removal

    Smoke odor can remain long after visible soot has been removed. Odors may become trapped in fabrics, insulation, wood, carpeting, and other porous materials.

    Restoration professionals may use specialized deodorization methods. The appropriate method depends on the source and severity of the odor.

    Structural Repairs and Reconstruction

    Some properties require more than cleaning. Fire can damage framing, drywall, roofing, electrical systems, plumbing, flooring, and other components.

    Reconstruction may therefore become the largest part of the restoration budget. A qualified contractor should clearly separate cleaning costs from rebuilding costs in the estimate.

    What to Expect During the Fire Restoration Process

    Knowing what happens next can make an overwhelming situation easier to manage. While every project is different, most fire damage restoration services follow a similar process.

    1. Initial Safety Assessment

    The first step is determining whether the property is safe to enter. Do not enter a fire-damaged building until the appropriate authorities have confirmed that it is safe.

    Structural instability, electrical hazards, smoke contamination, and other risks may remain after the flames are gone.

    2. Damage Inspection

    A restoration professional will inspect the property. The assessment may cover structural areas, smoke damage, water damage, personal belongings, and affected systems.

    Photos and documentation are often useful at this stage. Keep records of visible damage and damaged belongings when it is safe to do so.

    3. Emergency Protection

    The company may secure openings and protect areas from additional damage. Water extraction may also begin if firefighting water has entered the property.

    4. Smoke, Soot, and Water Cleanup

    Next, crews remove damaged materials and clean salvageable surfaces. They may also dry the property and address smoke odors.

    Not everything must be discarded. Some furniture, clothing, documents, and household items may be professionally cleaned or restored.

    5. Repair and Reconstruction

    Once cleanup is complete, rebuilding can begin. This may include drywall installation, painting, flooring, electrical repairs, roofing, cabinetry, and other construction work.

    If you need help planning several repairs at once, our home remodeling budget guide can help you organize renovation expenses.

    Does Homeowners Insurance Cover Fire Damage Restoration?

    Many homeowners insurance policies provide coverage for certain types of fire damage. However, coverage depends on the specific policy, exclusions, deductibles, limits, and circumstances of the loss.

    Contact your insurance company as soon as practical after a fire. Ask about the claims process, documentation requirements, temporary living expenses, and applicable deductibles.

    The USA.gov homeowners insurance resources can also help you understand general insurance considerations.

    Keep receipts for reasonable emergency expenses. These may include temporary accommodations or other necessary costs, depending on your policy.

    How to Choose a Fire Damage Restoration Company

    Choosing a restoration company is an important financial decision. Avoid selecting a provider based only on the lowest estimate.

    Check Experience

    Ask how much experience the company has with fire and smoke restoration. Fire cleanup is different from ordinary house cleaning.

    Ask for a Detailed Estimate

    A professional estimate should explain the work. Look for separate information about demolition, cleaning, drying, odor treatment, repairs, materials, and reconstruction.

    Verify Credentials and Insurance

    Ask whether the company carries appropriate business insurance and whether its technicians have relevant restoration training.

    You can also review guidance from the IICRC restoration industry organization when researching restoration standards and professional qualifications.

    Compare More Than One Company

    When circumstances allow, compare multiple qualified providers. Look beyond price. Consider experience, communication, scope of work, warranty information, and estimated completion time.

    Our home contractor comparison guide offers additional questions to ask before signing a contract.

    Questions to Ask Before Hiring a Restoration Company

    Before work begins, ask clear questions. This can prevent misunderstandings later.

    • Is the inspection included in the estimate?
    • Which services are included in the quoted price?
    • Will you handle smoke, soot, and odor cleanup?
    • How will damaged personal belongings be documented?
    • Will you coordinate with my insurance company?
    • Which materials can be restored instead of replaced?
    • Are reconstruction costs included?
    • How will additional charges be approved?
    • What is the estimated project timeline?
    • What warranties or guarantees are provided?

    Ways to Manage Fire Restoration Costs

    Fire restoration can create significant financial pressure. A few practical steps can help control costs without sacrificing necessary work.

    First, document the damage carefully. Good records can make insurance discussions easier. Second, request a written scope of work before approving major repairs.

    Next, separate emergency work from optional upgrades. Restoring the property to a safe condition should come first. Cosmetic improvements can often wait.

    Finally, ask about repair versus replacement options. Some items may be professionally restored for less than the cost of buying new replacements.

    Fire Damage Restoration vs. Fire Damage Repair

    These terms are related, but they are not identical. Fire damage restoration focuses on cleaning, stabilizing, drying, deodorizing, and returning the property to a usable condition.

    Fire damage repair often refers to fixing or replacing damaged structural and building components. A complete project may require both services.

    For example, a restoration company may remove smoke-damaged drywall and clean the surrounding area. A construction professional may then install new drywall, finish it, and repaint the room.

    How Long Does Fire Damage Restoration Take?

    The timeline depends on the severity of the fire. Minor smoke damage may be addressed relatively quickly. Major losses can take weeks or longer, especially when structural repairs are required.

    Insurance approvals, permits, material availability, hidden damage, and the size of the project can all affect the schedule.

    A reputable contractor should provide a realistic timeline and explain which factors could cause delays.

    Final Thoughts on Fire Damage Restoration Services: Cost & What to Expect

    Understanding Fire Damage Restoration Services: Cost & What to Expect can help you approach the recovery process with greater confidence. The total price depends on the fire’s severity, property size, smoke and water damage, structural repairs, and reconstruction needs.

    Start with safety. Then document the damage and contact your insurance provider. After that, compare qualified restoration companies and request detailed estimates.

    Most importantly, do not focus only on the cheapest quote. Look for clear communication, appropriate experience, professional documentation, and a detailed scope of work.

    With the right restoration plan, many fire-damaged properties can be cleaned, repaired, and returned to a safe and comfortable condition.

  • Mold Removal Services: Cost, Process & Prevention

    Mold Removal Services: Cost, Process & Prevention

    Mold Removal Services: Cost, Process & Prevention is an important topic for homeowners dealing with visible mold, musty odors, water damage, or recurring moisture problems. Mold can grow quickly when moisture is present. It may appear around plumbing leaks, roofs, windows, bathrooms, basements, HVAC systems, or areas affected by flooding.

    Removing visible mold is only part of the solution. The underlying moisture problem must also be corrected. Otherwise, mold can return after cleanup. The U.S. Environmental Protection Agency explains that moisture control is the key to controlling indoor mold growth.

    This guide explains mold removal costs, the professional remediation process, when to hire a specialist, and practical ways to prevent future growth.

    What Are Mold Removal Services?

    Mold removal services are professional services designed to identify, contain, clean, and address mold-affected areas in a property. Depending on the situation, the service may include moisture inspection, containment, removal of damaged materials, surface cleaning, drying, and repairs.

    Professional mold remediation is different from simply spraying a cleaner on visible spots. A qualified contractor should look for the source of moisture and determine whether mold has spread behind walls, under flooring, above ceilings, or into other concealed areas.

    The EPA notes that it is not possible to remove every mold spore from an indoor environment. The practical goal is to remove active growth and control the moisture conditions that allow it to develop.

    Mold Removal Cost: What Should You Expect?

    The price of mold removal varies widely. The affected area, severity of the problem, type of building materials, accessibility, water damage, and local labor rates all influence the final estimate.

    Small surface problems may require relatively little work. Larger remediation projects can become significantly more expensive when drywall, insulation, flooring, cabinets, or other porous materials need removal and replacement.

    Project Factor Potential Cost Impact
    Small surface cleanup Lower cost when damage is limited
    Large affected area Higher labor and containment costs
    Hidden mold May require demolition and additional inspection
    Water damage May require drying and structural repairs
    HVAC contamination Can require specialized evaluation and cleaning
    Porous material replacement Additional material and reconstruction costs

    For reliable pricing, request an itemized estimate from a qualified professional. The estimate should explain the affected areas, planned remediation steps, labor, equipment, disposal, testing if recommended, and reconstruction work.

    What Determines Mold Remediation Cost?

    Size of the Mold Problem

    The size of the affected area is one of the most important factors. The EPA states that homeowners can often handle mold areas smaller than approximately 10 square feet when conditions are suitable. Larger areas, extensive water damage, or complex situations may require professional assistance.

    Location of the Mold

    Mold on an accessible hard surface may be easier to address than mold inside a wall cavity. Mold behind drywall, beneath flooring, or inside insulation may require removal of affected materials.

    Water Damage

    If mold developed because of a leaking pipe, roof, appliance, foundation, or flood, fixing that problem becomes essential. A cleanup that ignores the water source may provide only temporary results.

    Damaged Building Materials

    Porous materials can be difficult to clean completely once heavily contaminated. The EPA notes that materials such as carpet and ceiling tiles may need to be discarded when they become moldy because mold can penetrate their surfaces.

    Accessibility

    Easy-to-reach areas are generally simpler to remediate. Tight crawl spaces, attics, wall cavities, and areas behind permanent fixtures may require additional labor and equipment.

    Professional Mold Removal Process

    1. Inspection and Moisture Assessment

    The process usually starts by identifying visible mold, musty odors, water damage, and moisture sources. Professionals may use moisture meters or other tools to locate damp materials.

    The objective is to understand why mold developed. A leak, condensation problem, drainage issue, or excessive indoor humidity may need to be corrected before remediation is considered complete.

    2. Containment

    For larger projects, professionals may isolate affected areas to reduce the movement of dust and mold-contaminated materials into clean parts of the property.

    Containment procedures depend on the size and location of the problem. A professional should choose methods appropriate for the specific property and level of contamination.

    3. Removal of Affected Materials

    Materials that cannot be effectively cleaned may need to be removed. This can include sections of drywall, insulation, carpet, or other porous materials.

    Removing contaminated materials is not the same as simply covering them. The EPA specifically advises against painting or caulking over mold because the underlying problem can remain.

    4. Cleaning and Drying

    Hard surfaces may be cleaned using appropriate methods. The area must then be dried thoroughly. Professionals may use air movers, dehumidification equipment, or other drying techniques when water damage is involved.

    Speed matters after water damage. The EPA recommends drying wet materials within 24 to 48 hours when possible to reduce the likelihood of mold growth.

    5. Moisture Source Correction

    This is one of the most important steps. A contractor may need to repair a plumbing leak, roof issue, drainage problem, condensation source, or ventilation problem.

    Without moisture control, even thorough cleaning may not provide a lasting solution.

    6. Final Inspection

    After remediation, the affected area should be checked for remaining visible mold, moisture problems, and odors. The EPA explains that cleanup is not complete until the moisture problem has been addressed and visible mold and mold-related odors are no longer present.

    When Should You Hire Mold Removal Services?

    Not every small mold spot requires a professional remediation company. However, professional help becomes more important when the affected area is large, water damage is extensive, contamination involves sewage, or mold may be inside an HVAC system.

    You should also consider professional assistance when you cannot identify the moisture source or when mold keeps returning after cleaning.

    The EPA recommends using experienced contractors for larger mold problems and checking references before hiring.

    If an HVAC system may be contaminated, professional evaluation is especially important. The EPA advises against operating a known or suspected contaminated HVAC system because it could distribute mold through the building.

    Is Mold Testing Necessary?

    Mold testing is often marketed as an essential first step. However, the CDC does not recommend routine mold testing. If mold is visible or there is a clear moisture problem, identifying the exact species is generally less important than removing the mold and correcting the moisture source.

    That does not mean every inspection is unnecessary. A professional evaluation can be useful when mold is hidden, the source is unclear, or the property has experienced significant water damage.

    Homeowners can also review the EPA mold and moisture guidance before deciding what type of professional assistance may be appropriate.

    Mold Prevention Tips for Homeowners

    Control Indoor Humidity

    Humidity management is one of the best ways to prevent recurring mold. The EPA recommends keeping indoor relative humidity below 60%, with an ideal range of approximately 30% to 50% when possible.

    A humidity meter can help homeowners monitor conditions. Air conditioning and dehumidification can also help in areas with excessive moisture.

    Fix Leaks Quickly

    Repair leaking pipes, roofs, windows, appliances, and other sources of water as soon as possible. Do not wait for a small leak to become a major restoration project.

    Improve Bathroom Ventilation

    Bathrooms naturally produce moisture. Use exhaust fans and make sure they vent appropriately. Keep surfaces dry when possible and address recurring condensation.

    The CDC recommends controlling humidity, improving airflow, using exhaust ventilation, and fixing leaks to help prevent mold growth.

    Dry Wet Materials Quickly

    After a leak or spill, dry affected materials as quickly as possible. Fast drying can reduce the opportunity for mold to develop.

    Maintain Gutters and Drainage

    Exterior water management also matters. Keep gutters clear and make sure water drains away from the foundation. Poor drainage can allow moisture to enter basements and crawl spaces.

    How to Choose a Mold Removal Company

    Choosing the right contractor can have a major impact on the quality of the remediation. Start by asking for several detailed estimates.

    • Ask how the contractor will identify and correct the moisture source.
    • Request an itemized written estimate.
    • Ask which materials will be cleaned and which may require removal.
    • Check references and relevant professional experience.
    • Ask how affected areas will be contained.
    • Confirm whether reconstruction is included or billed separately.
    • Ask about warranties or follow-up inspections.
    • Check your insurance policy if the mold resulted from covered water damage.

    You can also use established home-service resources such as home improvement and contractor services when researching local professionals.

    Health Considerations During Mold Cleanup

    Mold exposure can affect people differently. The CDC reports that exposure to damp and moldy environments can cause symptoms such as stuffy nose, sore throat, coughing, wheezing, irritated eyes, or skin reactions in some people. People with asthma or mold allergies may experience more significant reactions.

    People with certain respiratory conditions or weakened immune systems may face greater risks and should avoid participating in mold cleanup. The CDC provides detailed guidance on safe mold cleanup practices.

    For serious or extensive contamination, professional remediation is generally the safer approach.

    Final Thoughts on Mold Removal Services: Cost, Process & Prevention

    Mold Removal Services: Cost, Process & Prevention should be viewed as a complete moisture-management project rather than a simple cleaning job. The final price depends on the size of the affected area, location, water damage, building materials, accessibility, and required repairs.

    The most important principle is simple: remove the mold and fix the moisture source. Cleaning without moisture control can allow the problem to return. The EPA consistently identifies moisture control as the foundation of effective mold prevention.

    For homeowners, the best approach is to act quickly, obtain a clear professional assessment when needed, compare detailed estimates, and address leaks and humidity problems permanently. With the right process, mold problems can be managed while creating a cleaner and more comfortable home environment.

  • Water Damage Restoration Cost: Services & Recovery Guide

    Water Damage Restoration Cost: Services & Recovery Guide

    Understanding Water Damage Restoration Cost: Services & Recovery Guide information can help homeowners respond quickly when water damages a property. A burst pipe, leaking appliance, storm, overflowing toilet, or roof leak can create serious problems if the water is not removed promptly.

    Water damage restoration involves much more than drying a wet floor. Depending on the situation, professionals may need to extract standing water, dry walls and flooring, remove damaged materials, clean affected areas, control odors, and repair parts of the property.

    The final cost depends on several factors. These include the amount of water, affected square footage, source of the water, materials involved, drying time, and extent of repairs. This guide explains the major costs, restoration services, insurance considerations, and practical steps homeowners should take after water damage occurs.

    How Much Does Water Damage Restoration Cost?

    Water damage restoration costs vary greatly from one property to another. A small localized leak may cost a few hundred dollars to address. A major flood affecting multiple rooms can cost thousands of dollars or more.

    Angi reports that homeowners commonly pay several thousand dollars for professional water damage restoration, with the final amount depending on the size and severity of the loss. Emergency services, extensive drying, contaminated water, and reconstruction can increase the total. For current pricing information, review water damage restoration cost estimates.

    National averages are useful for initial planning. However, they should not replace an inspection. Every water loss is different.

    What Is Water Damage Restoration?

    Water damage restoration is the process of controlling, drying, cleaning, and restoring areas affected by unwanted water. The goal is to prevent further damage and return the property to a safe, usable condition.

    Restoration usually begins with an assessment. Technicians identify the water source, determine which areas are affected, and evaluate materials such as drywall, flooring, insulation, cabinets, and wood.

    Next, standing water is removed. Industrial equipment may then be used to dry the structure. Depending on the situation, damaged materials may need to be removed and replaced.

    For additional information about reducing moisture problems, homeowners can review the EPA’s mold cleanup guidance.

    Water Damage Restoration Services

    Water Extraction

    Water extraction is often the first major restoration step. Professionals use pumps, wet vacuums, and other equipment to remove standing water.

    Fast extraction matters because prolonged moisture can damage flooring, drywall, wood, furniture, and other materials. It can also increase the risk of mold growth.

    Structural Drying

    Removing visible water does not mean the property is completely dry. Moisture can remain inside walls, under flooring, behind cabinets, and in other hidden areas.

    Restoration companies may use air movers and dehumidifiers to reduce moisture. Moisture meters can help technicians identify areas that require additional drying.

    Cleaning and Sanitizing

    Water damage can leave behind dirt, bacteria, odors, and other contaminants. Cleaning requirements depend on the source of the water.

    Clean water from a supply line is different from water that has contacted sewage or other contaminants. The latter may require specialized cleanup and protective procedures.

    Damaged Material Removal

    Some materials cannot be effectively restored after prolonged exposure to water. Damaged drywall, insulation, carpet, padding, or other materials may need to be removed.

    Removing affected materials can increase the initial bill. However, appropriate removal can help prevent continuing moisture problems.

    Repairs and Reconstruction

    Restoration may stop after drying and cleaning, or it may continue into reconstruction. Reconstruction can include replacing drywall, flooring, cabinets, trim, insulation, or other building components.

    Ask whether your restoration estimate includes reconstruction. Some companies handle the complete process. Others focus only on water extraction and drying.

    What Factors Affect Water Damage Restoration Cost?

    1. Amount of Water

    The more water present, the more equipment and labor may be required. A small localized leak is usually easier to manage than a flooded basement or several affected rooms.

    2. Affected Area

    The size of the affected area directly influences labor and equipment requirements. Water can also travel beyond the location where the original leak occurred.

    3. Type of Water

    The source of the water is an important cost factor. Restoration professionals generally classify water damage based on contamination levels.

    Clean water may come from a broken supply pipe. More contaminated water can come from toilets, drains, flooding, or sewage. Heavily contaminated water requires greater safety precautions and specialized cleanup.

    4. Type of Materials

    Different materials respond differently to moisture. Hardwood flooring, drywall, carpet, insulation, cabinets, and structural wood may require different treatment.

    5. Time Before Restoration

    Delayed response can increase the extent of damage. Moisture may spread into additional materials and hidden spaces.

    The Environmental Protection Agency recommends addressing wet materials promptly because moisture problems can contribute to mold growth. Its mold and moisture information provides useful background for homeowners.

    6. Emergency Service

    Water emergencies do not always happen during normal business hours. Some restoration companies offer 24-hour emergency services. After-hours service may carry additional charges.

    Water Damage Categories Explained

    Understanding water classifications can help you understand why some restoration projects require more extensive work.

    Clean Water

    Clean water generally comes from a sanitary source, such as a broken water supply line. Although it may initially be relatively clean, it can become contaminated if it remains in the building for too long.

    Contaminated Water

    Water that contains significant contamination requires more careful handling. Examples may include water from certain plumbing failures or appliances.

    Highly Contaminated Water

    Water containing sewage, harmful substances, or other serious contaminants requires specialized procedures. Homeowners should avoid direct contact and follow professional safety recommendations.

    Signs You Need Professional Water Damage Restoration

    Not every small spill requires a restoration company. However, professional assistance is worth considering when water has entered walls, ceilings, flooring, insulation, or other hidden areas.

    Other warning signs include persistent dampness, musty odors, visible staining, warped flooring, bubbling paint, damaged drywall, or water that has spread across multiple rooms.

    Professional equipment can identify moisture that is not visible. This can be especially important after a significant leak.

    What to Do Immediately After Water Damage

    Quick action can help limit further damage. First, address the source of the water if it is safe to do so. For example, you may need to shut off the home’s main water supply during a plumbing emergency.

    If there is standing water near electrical equipment, do not enter the area or operate electrical devices unless it is safe. Contact an appropriate professional when electrical hazards may be present.

    Move valuable items away from affected areas when it is safe. Take photographs and videos of the damage for your records. Keep receipts for emergency services and related expenses.

    Do not attempt to clean contaminated water yourself. Sewage and other hazardous water can create health and safety risks.

    Does Homeowners Insurance Cover Water Damage?

    Insurance coverage depends on the cause of the water damage and the terms of your policy. Sudden and accidental damage may be covered in some situations. Gradual leaks, maintenance issues, flooding, and other causes may have different coverage rules.

    Flood damage may require separate flood insurance. Standard homeowners insurance does not automatically cover every type of flooding.

    The National Flood Insurance Program’s flood insurance resources can help homeowners understand flood-related coverage.

    Contact your insurance company as soon as practical after significant damage. Ask what documentation is required and whether the insurer wants to inspect the property before repairs begin.

    How to Compare Water Damage Restoration Companies

    When comparing restoration companies, do not focus only on price. Look at experience, response time, services, equipment, documentation, and communication.

    Ask whether the company provides emergency service. Confirm whether water extraction, structural drying, cleaning, mold-related services, and reconstruction are included.

    Request a written estimate whenever possible. The estimate should identify the work being performed and any expected additional charges.

    Check Credentials and Insurance

    Ask about applicable licenses, insurance, training, and certifications. Requirements vary by state and locality.

    You can also ask for references or examples of similar projects. A professional company should be willing to explain its restoration process.

    Ask About Drying Documentation

    For significant water losses, ask how the company measures moisture during the drying process. Documentation can show whether affected areas have reached appropriate dryness levels.

    How to Reduce Water Damage Restoration Costs

    The best way to reduce restoration costs is to limit the spread of water as soon as possible. Address leaks promptly and maintain plumbing, appliances, gutters, roofs, and drainage systems.

    Know where your main water shutoff valve is located. Every adult in the household should know how to access it.

    Regularly inspect areas beneath sinks and around water-using appliances. Look for unusual moisture, stains, corrosion, or damaged seals.

    Consider installing leak detection devices in areas with higher water risk. Early alerts may help you respond before a small leak becomes a major problem.

    Hidden Costs to Watch For

    The initial water removal estimate may not represent the complete restoration cost. Additional expenses can arise after materials are removed and hidden damage becomes visible.

    Potential costs include drywall replacement, flooring replacement, cabinet repairs, insulation removal, mold remediation, plumbing repairs, electrical work, painting, disposal, and reconstruction.

    Ask the restoration company which costs are included and which services are billed separately.

    Water Damage Restoration Checklist

    Use this checklist after a water emergency:

    • Stop the water source if it is safe.
    • Stay away from unsafe electrical areas.
    • Contact your insurance company when appropriate.
    • Photograph and document visible damage.
    • Remove valuables from affected areas when safe.
    • Arrange professional water extraction when necessary.
    • Ask about structural drying and moisture measurements.
    • Keep receipts and restoration documentation.
    • Confirm what your restoration estimate includes.
    • Ask about reconstruction before signing the contract.

    Final Thoughts on Water Damage Restoration Cost

    The true Water Damage Restoration Cost: Services & Recovery Guide figure depends on the extent of the damage, water source, affected materials, restoration timeline, and required repairs.

    Fast action can help limit the spread of moisture. However, safety should always come first. Avoid contaminated water and potentially dangerous electrical conditions.

    When professional restoration is necessary, compare detailed estimates instead of choosing a company based only on the lowest price. Ask about extraction, drying, cleaning, damaged materials, reconstruction, documentation, and insurance coordination.

    A well-managed restoration project can help prevent additional property damage and reduce the chance of ongoing moisture problems. By understanding the process and preparing in advance, homeowners can respond more confidently when unexpected water damage occurs.

  • Smart Home Installation Services: Cost & Benefits

    Smart Home Installation Services: Cost & Benefits

    Smart Home Installation Services: Cost & Benefits have become an important consideration for homeowners who want more convenience, better security, and improved energy management. A connected home can link lighting, thermostats, cameras, locks, speakers, appliances, and other devices through a single network.

    However, the cost of a smart home depends on what you install and how deeply the systems are integrated. A basic setup can be relatively affordable, while a professionally designed whole-home system can cost thousands of dollars. Understanding the options before hiring an installer helps you avoid unnecessary expenses and choose technology that delivers real value.

    What Are Smart Home Installation Services?

    Smart home installation services involve planning, installing, connecting, configuring, and testing connected devices throughout a property. Professional installers may work with smart lighting, security cameras, thermostats, door locks, garage controls, entertainment systems, sensors, and home networks.

    The goal is not simply to add individual gadgets. Instead, the goal is to create a reliable system in which compatible devices communicate and respond to scheduled actions, voice commands, smartphone controls, or automated routines.

    For example, a homeowner could create a routine that adjusts the thermostat, turns off selected lights, and locks compatible doors when the household leaves. The exact features depend on the devices, platform, and network used.

    How Much Do Smart Home Installation Services Cost?

    Current U.S. estimates show a wide range. Angi reports that smart home systems average about $201 to $1,519, with an average around $771, while professionally installed whole-home systems can reach about $4,000 or more. Other cost guides place basic integrated systems around $2,000 to $5,000, mid-level systems around $5,000 to $15,000, and luxury installations substantially higher.

    Smart Home Setup Typical Cost Range Common Features
    Basic $200–$1,500+ Thermostat, lights, speaker, sensors
    Entry-Level Integrated $2,000–$5,000 Security, lighting, climate, smart controls
    Mid-Level $5,000–$15,000 Whole-home automation and multiple systems
    Luxury $15,000+ Custom automation, entertainment, security, shades, and climate

    These figures are useful for budgeting rather than guaranteed quotes. Your location, home size, device selection, wiring, network infrastructure, and installer all affect the final price.

    Smart Home Installation Cost by Device

    Smart Thermostats

    A smart thermostat is one of the most practical starting points. It can allow remote temperature control, scheduling, and automation. Current estimates put professional smart thermostat installation at roughly $200 to $500, including the thermostat and labor.

    If your HVAC system needs wiring modifications, the installation may cost more. Therefore, an installer should check compatibility before purchasing the thermostat.

    Smart Lighting

    Smart lighting can include bulbs, switches, dimmers, and automated scenes. Basic devices can be inexpensive, but professional installation becomes more valuable when replacing switches, adding wiring, or integrating lighting across multiple rooms.

    Lighting automation can also contribute to energy management. The U.S. Department of Energy notes that efficient lighting technologies can significantly reduce lighting energy use compared with older technologies.

    Security Cameras and Smart Locks

    Security-focused installations may include cameras, video doorbells, smart locks, motion sensors, window sensors, and alarms. These systems can provide remote notifications and convenient access control.

    Professional installation is particularly useful when cameras require permanent mounting, network configuration, or power connections. It can also help ensure that devices are positioned correctly and configured securely.

    Smart Hubs and Controllers

    A hub or controller can act as the central point for a smart home ecosystem. The hardware may range from a simple smart speaker to a dedicated professional control system.

    Before buying a controller, check compatibility. Matter is an industry standard designed to improve interoperability among compatible smart home products. The Connectivity Standards Alliance explains that Matter supports multiple ecosystems and technologies, including Wi-Fi, Thread, and Ethernet.

    What Affects Smart Home Installation Costs?

    Number of Devices

    More devices generally mean higher hardware and installation costs. A small apartment with a thermostat, a few lights, and a smart speaker is very different from a five-bedroom home with dozens of sensors, cameras, locks, and automated shades.

    Home Size and Layout

    Larger homes may need additional network equipment, sensors, hubs, and wiring. Thick walls and large distances between devices can also affect wireless performance.

    Wired vs. Wireless Installation

    Wireless devices are often simpler to install. However, a professionally wired system can provide a more permanent solution for selected applications. Running Ethernet cables, adding electrical connections, or opening walls can increase labor costs.

    Electrical and Network Upgrades

    Your existing infrastructure matters. An older home may need electrical improvements or stronger Wi-Fi coverage before a large smart home system can work reliably.

    Network preparation is especially important because smart devices depend on dependable connectivity. A professional installer can identify weak coverage areas and recommend appropriate equipment.

    Customization

    Custom programming can raise the project price. A simple app-controlled setup requires less configuration than a system that coordinates lighting, security, HVAC, entertainment, motorized shades, and multiple rooms.

    Benefits of Professional Smart Home Installation

    Better Convenience

    One of the biggest advantages is convenience. Instead of managing every device separately, homeowners can create routines and centralized controls.

    Smart lighting can be scheduled. Thermostats can respond to programmed routines. Compatible locks can be controlled remotely. Entertainment equipment can be integrated into simple scenes.

    Improved Home Security

    Smart security technology can provide alerts, remote monitoring, cameras, access controls, and sensors. Professional installation can help reduce configuration mistakes and ensure devices are positioned and connected appropriately.

    Security should also include digital protection. Use strong passwords, enable available security features, keep firmware updated, and choose reputable products with ongoing support.

    Potential Energy Savings

    Smart technology can support better energy management. Programmable and smart thermostats can automate temperature schedules, while connected lighting can reduce unnecessary operation.

    The Department of Energy says programmable thermostat adjustments can save as much as 10% annually on heating and cooling in suitable situations. Actual savings vary according to climate, equipment, occupancy, and how the system is operated.

    Matter has also expanded its energy-management capabilities. Its newer specifications include features designed to help connected devices report and manage energy-related information.

    Scalability

    A well-planned system can grow with your household. You might begin with smart lighting and a thermostat, then add security cameras, sensors, locks, or other compatible devices later.

    This approach can be more practical than purchasing an expensive system all at once. Ask your installer to plan for future expansion before work begins.

    DIY vs. Professional Smart Home Installation

    DIY installation can make sense for simple plug-in devices. Smart bulbs, outlets, speakers, and some sensors can often be configured without professional assistance.

    Professional installation becomes more valuable when the project involves electrical work, permanent wiring, multiple systems, complicated networking, or whole-home automation.

    Professional service can also reduce compatibility problems. Instead of purchasing devices first and discovering that they cannot communicate properly, an installer can help develop a system around your requirements.

    How to Choose Smart Home Installation Services

    Start by identifying your main goals. Do you want better security? Lower energy use? Easier lighting control? Whole-home entertainment? Or simply greater convenience?

    Then request detailed quotes from qualified installers. Each quote should identify hardware, labor, programming, wiring, network upgrades, permits where applicable, and ongoing subscription fees.

    Ask whether the installer provides post-installation support. Smart home technology changes quickly, so ongoing troubleshooting and system updates can be valuable.

    It is also worth checking whether proposed products support widely adopted standards such as Matter. Better interoperability can make future upgrades easier.

    Ways to Reduce Smart Home Installation Costs

    You do not need to automate everything immediately. Begin with the features that solve your biggest problems.

    • Start with high-value devices such as a smart thermostat or security system.
    • Use compatible devices from the same ecosystem where practical.
    • Ask for a complete project quote instead of pricing every device separately.
    • Plan network improvements before installing dozens of connected devices.
    • Choose products that support recognized interoperability standards.
    • Leave room in your budget for installation, programming, and future maintenance.

    Comparing several professional quotes can also reveal where costs are coming from. For broader home improvement planning, homeowners can review resources from home improvement cost and contractor resources before starting a project.

    Are Smart Home Installation Services Worth It?

    For many homeowners, the answer depends on how the technology will be used. A smart home is most valuable when automation solves real problems rather than simply adding more gadgets.

    If you want better climate control, security monitoring, lighting automation, or centralized device management, professional installation can provide meaningful convenience. It may also reduce compatibility and setup problems.

    For homeowners focused on energy efficiency, smart controls can be part of a broader strategy. The Department of Energy provides useful guidance on home energy efficiency and smart technology.

    For interoperability planning, homeowners can also explore the Matter smart home standard and learn which compatible products may work across supported ecosystems.

    Final Thoughts on Smart Home Installation Services: Cost & Benefits

    Smart Home Installation Services: Cost & Benefits should be evaluated based on long-term usefulness, not just the number of devices installed. Basic systems may cost hundreds of dollars, while integrated installations can reach several thousand dollars or more.

    The best strategy is to define your goals first, establish a realistic budget, and then choose compatible technology. Professional installation is particularly worthwhile for complex wiring, security systems, HVAC connections, and whole-home automation.

    With careful planning, a smart home can become more than a collection of connected gadgets. It can provide practical automation, easier control, improved security, and smarter energy management while giving homeowners a system that can grow over time.